• Welcome to Smashboards, the world's largest Super Smash Brothers community! Over 250,000 Smash Bros. fans from around the world have come to discuss these great games in over 19 million posts!

    You are currently viewing our boards as a visitor. Click here to sign up right now and start on your path in the Smash community!

Smash Bros. Moveset Creation Thread

Perkilator

Smash Legend
Joined
Apr 8, 2018
Messages
10,666
Location
The perpetual trash fire known as Planet Earth(tm)
Have any ideas for a Smash Bros. moveset? Feel free to post them right here, no rules or stipulations. It can be a newcomer or it can be a veteran rework.

Anyway, here's my moveset for Veyle:


  1. Default
  2. Alear (red/blue)
  3. Alfred (blue/gold)
  4. Diamant (red/white)
  5. Ivy (purple/magenta)
  6. Timerra (pink/white)
  7. Corrupted (black/red)
  8. Lumera (blue)
Intro: Veyle appears from a dark Warp circle.

Stance/Idle 1: Her idle stance from Engage while in combat, with her knife in her right hand.
Idle 2: Veyle holds her arm with her open hand.
Idle 3: Veyle briefly clasps her knife with both hands.

Walk: Veyle carefully walks forward, knife in hand.
Dash: Veyle’s dash animation before engaging an enemy.
Damage: Veyle’s damage animation from Engage.
Jump: Similar to Palutena’s jump.
Crouch: Veyle crouches with both knees bent.

Taunts
Up: “I won’t lose!”
Side: I’m strong after all”
Down: “I hope I’ve done well.”

Winposes
1: “I just want to live in peace.” Veyle’s victory animation from Engage.
2: “We are guided by the Emblems!” Veyle strikes a pose with her older sister, Alear.
3: “Feel what I feel.” Veyle turns her back to the camera and tosses her knife into the air before catching it; based on Yunaka’s victory animation with a knife.

Applause: Veyle claps for the winner.
Icon: Falchion
Boxing Ring Title: Gentle Dragon
Star K.O.: “I can fight no moooore…!”
Victory Music: Determined Journey (Flare)
Kirby Hat: Veyle’s hair and tiara
Jab: Veyle horizontally slashes twice (3% each hit, small knockback)
Forward+A: Veyle extends her open hand forward and a blast of dark magic burst from her palm (7%, small knockback)
Up+A: A backward overhead slash (7%, small knockback)
Down+A: A horizontal slash across the ground (5%, small knockback)
Dash Attack: A dashing horizontal slash imbued in darkness (9%, small knockback)
Edge Attack: Veyle slashes inward while climbing back up (7%, small knockback)
Get-Up Attack: A slash on both sides of Veyle (5%, small knockback)

Aerial Attacks
Air+A: Veyle unleashes a vortex of darkness around herself (11%, OK knockback)
Air Forward+A: A downward knife slash (8%, small knockback)
Air Back + A: An upward knife slash (8%, small knockback)
Air Up+A: Veyle unleashes a vortex of darkness above herself (11%, OK knockback)
Air Down+A: Veyle unleashes a blast of darkness below herself (12%, OK knockback)

Smash Attacks
Forward+A: Veyle leaps forward and performs an uppercut with her knife (16%, OK knockback)
Up+A: Veyrle raises a pillar of dark magic from the ground in front of her (16%, OK knockback)
Down+A: Veyle summons a pool of dark magic from underneath where she’s standing (16%, OK knockback)

Grab Game
Grab: Veyle grabs the opponent with dark magic.
Pummel: A horizontal slash (1%)
Forwards+Throw: Veyle pushes the opponent forward (8%, small knockback)
Back+Throw: Veyle strafes behind the opponent and slashes them (10%, OK knockback)
Up+Throw: Veyle heaves the opponent into the air (7%, small knockback)
Down+Throw: Veyle short hops and performs a downwards knife slash (9%, small knockback)
B : Obscurité; Veyle summons a slow-moving dark orb with very slight homing properties that sucks in opponents. Pressing B again while the orb is active has Veyle drop a beam of darkness down from the sky, causing an explosion (12%, OK knockback). The orb disappears after a while, but it can be used in tandem with Veyle’s side and down specials.
B + ← → : Misericorde; Veyle infuses her knife with dark magic before hopping into the air and throwing it at a slightly downward diagonal angle, hitting multiple opponents and poisoning them upon contact (4%, small knockback). If the knife hits the Obscurité orb, it instead travels in an upward diagonal angle.
B + ↑ : Fell Protection; Veyle sprouts (illusions of) dragon-like wings and flies in the direction tilted on the control stick. While the special deals no damage, the distance traveled is impressive and Veyle is completely intangible during the flight.
B + ↓ : Fell Spirit; Veyle channels draconic flames into her palms, then drives them forward with a fiery blast that restores a small portion of her Engage Meter upon contact (8%, OK knockback)

Fighter Ability: Engage
Veyle starts each battle with a full Engage Meter, one bar of which consists of a ⅓ blue line. Just be warned that the Engage Meter resets to 0 whenever she gets K.O.’d, though it refills slowly over time.

Engage Mode is activated by pressing Shield + B, after which Veyle summons her older sister Alear to fight by her side. Once Alear is summoned, Veyle’s knife is replaced with the Emblem Weapon Lyrátion, and her special moves receive new versions that use one bar of the Engage Meter.

B : Holy Aura; Veyle summons an orb of red and blue draconic flames that moves faster but travels in a straight line (8%, small knockback). Pressing B again while the orb is active has both Veyle and Alear manually detonate the orb (16%, OK knockback).
B + ← → : Dragon Blast; Veyle and Alear hop into the air and perform a downward crescent slash, firing a crescent projectile (14%, OK knockback). If it connects with Holy Aura, the crescent spins rapidly, moves faster, and hits multiple times (4% each hit).
B + ↑ : Holy Shield; Veyle and Alear sprout (illusions of) angel-like wings and fly in the direction tilted on the control stick. This attack travels far, deals a single hit (17%, OK knockback) and Veyle is completely intangible during the flight.
B + ↓ : Dragon Fist; Veyle and Alear Channel draconic energy into their palms, then drive them forward with a fiery blast (13%, OK knockback). If it connects with Holy Aura, it turns me into a red and blue fireball (18%, OK knockback).

Final Smash: Bond Blast; Veyle speeds forward and attacks with Lyrátion (4%). If it connects, Alear then immediately follows up by attacking with Libération (4%). Veyle and Alear then fly into the sky and fire a laser straight towards the ground, hitting any opponents caught by the initial attack (52%, devastating knockback). This Final Smash can be used regardless of whether or not Veyle is in Engage Mode.
 

Godzillathewonderdog

Smash Master
Joined
Jun 3, 2013
Messages
3,437
Here is my moveset for Ditto

I understand that a character that transforms into a different character for every attack in a game like Smash might look sloppy and would realistically take a lot of time and resources, so it’s unlikely to ever happen in this way, but the concept is too fun for me to pass up. I prevented having Ditto transform into Pokémon that are way bigger then it with the exception of the Final Smash, going from Kirby size to Bowser size in an instant might be too janky/jarring, even for this concept. Speaking of I’ve sized up Ditto to be close to Kirby’s size, maybe a little bit taller. I made sure to include Pokémon of each type and generation in this moveset.

When an animation ends revert back to Ditto

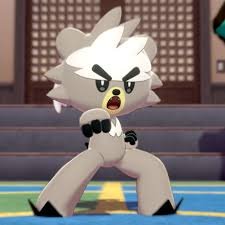
Jab: Kubfu: Close Combat: The user attacks with a flurry of punches, ending with a kick


Forward Tilt Crogunk: Poison Jab: The user stabs forward with a arm steeped in poison, may cause a foe to continue taking


IMG_6355.jpeg


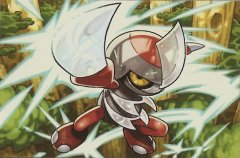
Up Tilt: Metal Claw: Pawniard: The user attacks by slashing upward with a sharp metal claw


Down Tilt: Bellossom: Grass Knot: Causes grass to come out of the ground in the shape of a knot, high chance of causing your foe to trip (forgive the crude grass knot drawing)


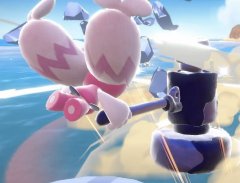
Forward Smash: Tinkaton: Gigaton Hammer: The user swings its whole body around to attack with its huge hammer


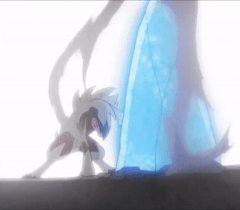
Up Smash: Lycanrock (Midnight): Stonedge: The user punches the ground causing sharpened stones to jut out from below


Down Smash: Golem: Smack Down: The user jumps up, curls into a ball and slams down, causes the ground around it to shake causing near by grounded foes it missed to be launched slightly upwards


IMG_6439.jpeg


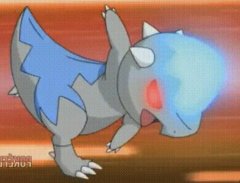
Dash Attack: Cranidos: Zen Headbutt: The user focuses its willpower to its head and rams the foe


Neutral Air: Koffing: Poison Gas: A cloud of poison gas is sprayed around the users body


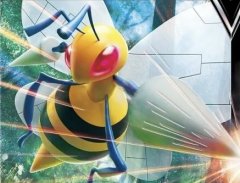
Forward Air: Beedrill: Twin Needle: Jabs forward twice using its stinger


Back Air: Mawile: Crunch: The user crunches up behind them with sharp teeth


IMG_6384.jpeg


Up Air: Chandelure: The user ignites the flames on its head and arms upwards


IMG_6424.jpeg


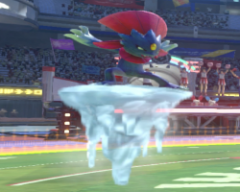
Down Air: Weavile: Icicle Crash: The user forms an icicle below it’s feet before kicking it downward


Get Up Attack: Staryu: Rapid Spin: Spins the body at high speed

Ledge Grab/Attack: After hanging onto the ledge with its tail the user jumps back up on the platform and slams it down


IMG_6436.gif


Grab/Throws: Throh: Each throw is based on real life judo throws (I considered having Ditto transform into a different Pokémon for each throw, but I can’t imagine them transforming mid grab would look good)


IMG_6356.gif


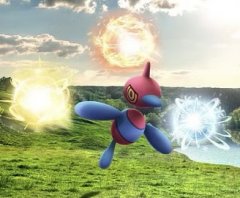
Neutral Special: Porygon Z: Tri Attack: The user strikes with a simultaneous three-beam attack formed together in a triangular field, this may also burn, freeze, or paralyze the target


Side Special: Alolan Marowak: Bonemerang: The user throws the bone it holds, the bone loops around to damage the target, hold the attack to power it up, when fully charged the bone is engulfed in fire/shadowy aura.


IMG_6446.gif


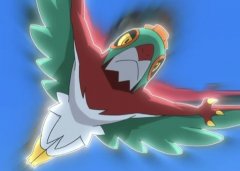
Up Special: Hawlucha: Flying Press: The user leaps high then dives down


Down Special: Drilbur: Dig: The user puts both claws together and rotates down to burrow into the ground, while underground the user can move side to side, press the attack/special button to launch upward with both claws together, the longer you stay underground the longer the end lag of the attack, after 3 seconds you are forced out, using it on a soft platform will cause the user to pass through it


Final Smash: Mega Rayquaza: Dragon Ascent: After soaring upward, the user attacks its target by dropping out of the sky at high speeds


IMG_6451.jpeg


Additional Transformations

Walk: Toedscool walks on its tentacles

Run: Litleo runs on all fours

Jump: Spoink springs upward

Double Jump: Staravia flaps itwings

Crouch/Crawl: Caterpie lays down and can slowly crawl

Spot Dodge/Roll: Ghastly becomes transparent and floats out the way

Shield: Shuckle hides in its shell

Wall Cling: Goomy sticks to the wall

Some of these additional transformations are probably unnecessary and excessive, but they were fun to come up with.
 

DreamyMystX64

Smash Cadet
Premium
Joined
Nov 6, 2021
Messages
35
Have any ideas for a Smash Bros. moveset? Feel free to post them right here, no rules or stipulations. It can be a newcomer or it can be a veteran rework.

Anyway, here's my moveset for Veyle:


  1. Default
  2. Alear (red/blue)
  3. Alfred (blue/gold)
  4. Diamant (red/white)
  5. Ivy (purple/magenta)
  6. Timerra (pink/white)
  7. Corrupted (black/red)
  8. Lumera (blue)
Intro: Veyle appears from a dark Warp circle.

Stance/Idle 1: Her idle stance from Engage while in combat, with her knife in her right hand.
Idle 2: Veyle holds her arm with her open hand.
Idle 3: Veyle briefly clasps her knife with both hands.

Walk: Veyle carefully walks forward, knife in hand.
Dash: Veyle’s dash animation before engaging an enemy.
Damage: Veyle’s damage animation from Engage.
Jump: Similar to Palutena’s jump.
Crouch: Veyle crouches with both knees bent.

Taunts
Up: “I won’t lose!”
Side: I’m strong after all”
Down: “I hope I’ve done well.”

Winposes
1: “I just want to live in peace.” Veyle’s victory animation from Engage.
2: “We are guided by the Emblems!” Veyle strikes a pose with her older sister, Alear.
3: “Feel what I feel.” Veyle turns her back to the camera and tosses her knife into the air before catching it; based on Yunaka’s victory animation with a knife.

Applause: Veyle claps for the winner.
Icon: Falchion
Boxing Ring Title: Gentle Dragon
Star K.O.: “I can fight no moooore…!”
Victory Music: Determined Journey (Flare)
Kirby Hat: Veyle’s hair and tiara
Jab: Veyle horizontally slashes twice (3% each hit, small knockback)
Forward+A: Veyle extends her open hand forward and a blast of dark magic burst from her palm (7%, small knockback)
Up+A: A backward overhead slash (7%, small knockback)
Down+A: A horizontal slash across the ground (5%, small knockback)
Dash Attack: A dashing horizontal slash imbued in darkness (9%, small knockback)
Edge Attack: Veyle slashes inward while climbing back up (7%, small knockback)
Get-Up Attack: A slash on both sides of Veyle (5%, small knockback)

Aerial Attacks
Air+A: Veyle unleashes a vortex of darkness around herself (11%, OK knockback)
Air Forward+A: A downward knife slash (8%, small knockback)
Air Back + A: An upward knife slash (8%, small knockback)
Air Up+A: Veyle unleashes a vortex of darkness above herself (11%, OK knockback)
Air Down+A: Veyle unleashes a blast of darkness below herself (12%, OK knockback)

Smash Attacks
Forward+A: Veyle leaps forward and performs an uppercut with her knife (16%, OK knockback)
Up+A: Veyrle raises a pillar of dark magic from the ground in front of her (16%, OK knockback)
Down+A: Veyle summons a pool of dark magic from underneath where she’s standing (16%, OK knockback)

Grab Game
Grab: Veyle grabs the opponent with dark magic.
Pummel: A horizontal slash (1%)
Forwards+Throw: Veyle pushes the opponent forward (8%, small knockback)
Back+Throw: Veyle strafes behind the opponent and slashes them (10%, OK knockback)
Up+Throw: Veyle heaves the opponent into the air (7%, small knockback)
Down+Throw: Veyle short hops and performs a downwards knife slash (9%, small knockback)
B : Obscurité; Veyle summons a slow-moving dark orb with very slight homing properties that sucks in opponents. Pressing B again while the orb is active has Veyle drop a beam of darkness down from the sky, causing an explosion (12%, OK knockback). The orb disappears after a while, but it can be used in tandem with Veyle’s side and down specials.
B + ← → : Misericorde; Veyle infuses her knife with dark magic before hopping into the air and throwing it at a slightly downward diagonal angle, hitting multiple opponents and poisoning them upon contact (4%, small knockback). If the knife hits the Obscurité orb, it instead travels in an upward diagonal angle.
B + ↑ : Fell Protection; Veyle sprouts (illusions of) dragon-like wings and flies in the direction tilted on the control stick. While the special deals no damage, the distance traveled is impressive and Veyle is completely intangible during the flight.
B + ↓ : Fell Spirit; Veyle channels draconic flames into her palms, then drives them forward with a fiery blast that restores a small portion of her Engage Meter upon contact (8%, OK knockback)

Fighter Ability: Engage
Veyle starts each battle with a full Engage Meter, one bar of which consists of a ⅓ blue line. Just be warned that the Engage Meter resets to 0 whenever she gets K.O.’d, though it refills slowly over time.

Engage Mode is activated by pressing Shield + B, after which Veyle summons her older sister Alear to fight by her side. Once Alear is summoned, Veyle’s knife is replaced with the Emblem Weapon Lyrátion, and her special moves receive new versions that use one bar of the Engage Meter.

B : Holy Aura; Veyle summons an orb of red and blue draconic flames that moves faster but travels in a straight line (8%, small knockback). Pressing B again while the orb is active has both Veyle and Alear manually detonate the orb (16%, OK knockback).
B + ← → : Dragon Blast; Veyle and Alear hop into the air and perform a downward crescent slash, firing a crescent projectile (14%, OK knockback). If it connects with Holy Aura, the crescent spins rapidly, moves faster, and hits multiple times (4% each hit).
B + ↑ : Holy Shield; Veyle and Alear sprout (illusions of) angel-like wings and fly in the direction tilted on the control stick. This attack travels far, deals a single hit (17%, OK knockback) and Veyle is completely intangible during the flight.
B + ↓ : Dragon Fist; Veyle and Alear Channel draconic energy into their palms, then drive them forward with a fiery blast (13%, OK knockback). If it connects with Holy Aura, it turns me into a red and blue fireball (18%, OK knockback).

Final Smash: Bond Blast; Veyle speeds forward and attacks with Lyrátion (4%). If it connects, Alear then immediately follows up by attacking with Libération (4%). Veyle and Alear then fly into the sky and fire a laser straight towards the ground, hitting any opponents caught by the initial attack (52%, devastating knockback). This Final Smash can be used regardless of whether or not Veyle is in Engage Mode.
At least I'm not alone when it comes to Veyle in Smash after all. I also assumed she'd be a great joke fighter candidate!
 

ninjahmos

Smash Ace
Joined
Aug 12, 2018
Messages
853
Location
Noneya Business
Switch FC
SW-8579-4123-9016
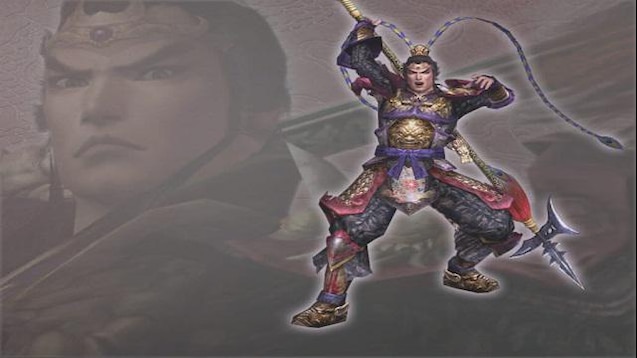
Alright, here's my moveset for Lu Bu:

1. Default (Dynasty Warriors 2-5)
2. Shu (Green/Blue)
3. Wei (Blue/Purple)
4. Wu (Red/Orange)
5. Dynasty Warriors 7
6. Dynasty Warriors 8
7. Dynasty Warriors 9
8. Cyberpunk Armor
Intro: Lu Bu arrives on his horse Red Hare and dismounts.

Stance/Idle 1: His Idle stance from Dynasty Warriors 7/8 while in battle, with his halberd in his right hand.
Idle 2: Lu Bu holds his halberd with both hands, like in Dynasty Warriors 2-5.
Idle 3: Lu Bu spins his halberd with both hands and sets the other end of it on the ground in his right hand.

Walk: Lu Bu walks forward, halberd in one hand.
Dash: Lu Bu fiercely runs forward.
Damage: Damage animations from the Dynasty Warriors series.
Jump: Lu Bu's jump from the Dynasty Warriors series.
Crouch: Lu Bu crouches with one knee on the ground.

Taunts
Up: "You dare face the mighty Lu Bu?"
Side: "I have no time for the likes of you!"
Down: "I'll show you what True Might is!"

Winposes
1. "Can anybody provide me with a decent challenge?!" Lu Bu's victory pose from Dynasty Warriors 4.
2. "I am the Greatest Warrior of the Three Kingdoms!" Lu Bu swings his halberd a few times and strikes a pose.
3. "Did you really think you could take me on?" Lu Bu spins his halberd with both hands and sets the other end of it on the ground in his right hand.

Applause: Lu Bu will either clap for the winner or do his Defeated pose from Dynasty Warriors 5.
Icon: The Shin Sangoku Musou Emblem
Boxing Ring Title: The Avatar of Battle
Star K.O.: "Aaaaaaargh...!"
Victory Music: Victory Jubilee (Dynasty Warriors)
Kirby Hat: Lu Bu's hair and crown
Jab: Lu Bu does a wide swing to the left (3%), another swing to the right (3%), a frontal overhead swipe (4%), a round slash to the right while holding his left palm outward (5%), a spinning swing with his halberd held at a slightly lower angle (6%), a round angular swipe towards the front (7%), numerous criss-crossing swings done back and forth (8% each hit), then drives his halberd into the ground to create a powerful quake (9%, small knockback)
Forward+A: Lu Bu does a wide horizontal swing (7%, small knockback)
Up+A: A backward overhead swing (7%, small knockback)
Down+A: A small, crouching horizontal swing (5%, small knockback)
Dash Attack: His Dash Attack from the Dynasty Warriors series (11%, OK knockback)
Edge Attack: Lu Bu swings his halberd vertically as he climbs back up (8%, small knockback)
Get-Up Attack: A back-and-forth swing on both sides of Lu Bu (7%, small knockback)

Aerial Attacks
Air+A: Lu Bu spins around with his halberd extended in one hand (13%, OK knockback)
Air Forward+A: A downward arcing swing (15% with a meteor effect, OK knockback)
Air Back+A: A backward horizontal swing (11%, OK knockback)
Air Up+A: An overhead swing (9%, small knockback)
Air Down+A: Lu Bu swings his halberd from underneath him (9%, small knockback)

Smash Attacks
Forward+A: Lu Bu does a heavy downward arching swing with his halberd (20%, medium knockback)
Up+A: A strong backward overhead swing (22%, medium knockback)
Down+A: A spinning horizontal swing across the ground (22%, medium knockback)

Grab Game
Grab: Lu Bu grabs the opponent with his free hand.
Pummel: Lu Bu knees his opponent (1%)
Forward+Throw: Lu Bu does a spin and tosses his opponent (7%, small knockback)
Back+Throw: Lu Bu turns back and tosses his opponent (7%, small knockback)
Up+Throw: Lu Bu tosses his opponent upward (4%) and quickly swings his halberd upward (8%, small knockback)
Down+Throw: Lu Bu slams his opponent into the ground (6%) and thrusts the end of his halberd into the opponent. (9%, small knockback)
B : Charge Attack; While on the ground, Lu Bu will release two flaming swings from his halberd while moving forward (6% each), then stomp the ground to create a bursting effect. (12%, OK knockback) If Charge Attack is done in the air, Lu Bu will give the ground a hard stomp (10%, OK knockback)

B + Side : Red Hare; Lu Bu will charge across the stage on his horse Red Hare while thrusting his halberd like a lance (14%, OK knockback)

B + Up : Rising Halberd; Lu Bu will swing his halberd upward (12%, OK knockback) and jump high. If you press B again after doing Rising Halberd, Lu Bu will strike his opponent downward (12% with a meteor effect, OK knockback)

B + Down : Parry; Lu Bu will counter his opponent's attack with a downward arching strike from his halberd (13%, OK knockback)

Fighter Ability: Musou Gauge
Lu Bu will start each battle with an empty Musou Gauge. It can be filled up by attacking opponents or taking damage. You can also fill it up by holding B. If Lu Bu is at high damage (70% or more), or if he has the Final Smash, he'll be in True Musou mode. The gauge will slowly refill on its own, and the effects of the Musou Attack will be greater.

B : Musou Attack; Lu Bu will do a series of angled spinning slashes while jumping continuously, and end with a powerful ground slam. (30%, or 40% if Lu Bu is at 70% or higher, great knockback)

Final Smash: True Musou Attack - Spirit Bomb; Lu Bu lets out a roar before plunging his halberd forward at a slightly higher angle, conjuring a black vortex of energy surging with red electricity (55%, devastating knockback). This Final Smash will K.O. any opponents at 100% damage or more.
 
Last edited:

Godzillathewonderdog

Smash Master
Joined
Jun 3, 2013
Messages
3,437
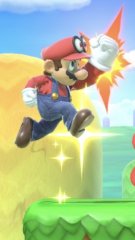
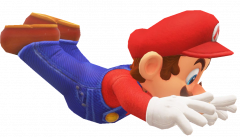
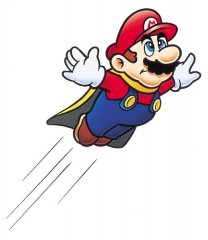
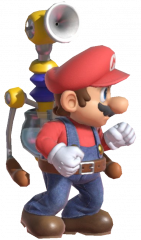
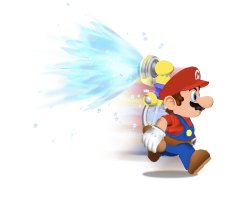
Here is my rework for Mario, implementing more power ups and abilities from various games.
Jab, down smash, get up attack, ledge attack, neutral special, pummel and throws are the same. Forward air is also the same, but now Mario’s fist is engulfed in flames like in his Smash Bros. Ultimate mural art.

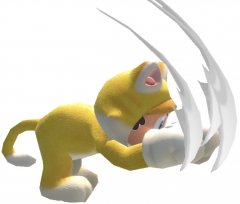
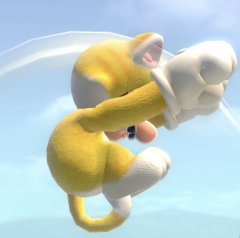
Forward Tilt - Cat Swipe: Mario dons cat paws, raises up his arms and swipes down in front of him
Up Tilt - Jump Punch: Like Mario’s original up special, but height of jump is much shorter, doesn’t move forward, and is a single hit (1 coin comes out of an enemy when hit)

Down Tilt - Raccoon Tail Spin: Mario dons a raccoon tail and ears and does a quick crouching spin hitting opponents in front of you with the tail

IMG_6279.jpeg


Forward Smash - Hammer: Charges his hammer behind and above his head and slams it down when let go

Up Smash - Fire Brand: While charging Mario holds up his arm above his head with a small flame emitting from his palm, slowly expands the longer you charge and bursts when let go

IMG_6237.jpeg


Dash Attack - Cat Slide: Mario dons cat paws, pounces forward, and slides a bit

Neutral Air - Star Spin: Mario does a quick spin, first time using it has Mario rise up a little bit

IMG_6240.jpeg


Back Air - Raccoon Tail Swipe: Mario dons Raccoon tail and ears, sticks out his bottom and performs a multi hit tail swipe


Up Air - Upward Cat Swipe: Mario dons cat paws and swipes 1 paw above him in an arc

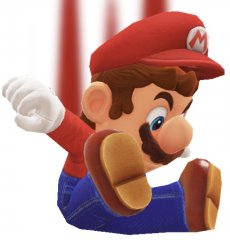
Down Air - Ground Pound: Slams down to the ground, bottom first


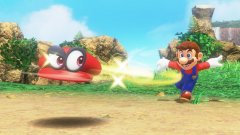
Side Special - Cappy Throw: Mario throws his Cappy hat and will stay out spinning for a couple seconds causing slight damage and knock back

Side Special with Cappy out - Dive: While Cappy is out spinning you can press side special again to have Mario perform a dive, you can dive into Cappy to bounce off him helping with recovery, if you’re still in the air after bounce you can throw Cappy again, but can not bounce of him again


Up Special - Flight: Functions similarly to Pit’s Up Special, alternates between Mario wearing a cape, wing cap and raccoon ears & tail (the change is purely cosmetic)

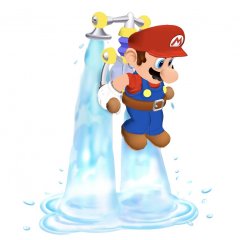
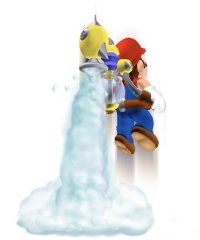
Down Special - F.L.U.D.D.: Changes all special moves, F.L.U.D.D. is always visibly out in this state (this might be excessive, but I don’t care :p)

F.L.U.D.D. Neutral Special - Squirt Nozzle : Functions the same as Mario’s current down special

F.L.U.D.D. Side Special - Turbo Nozzle: Slow charge up, huge burst forward on ground, useless in the air

F.L.U.D.D. Up Special on ground - Hover Nozzle: Raises Mario up water is sprayed below him allowing him to hover above the ground briefly, this move deals no damage but can trip opponents


F.L.U.D.D. Up Special in the air - Rocket Nozzle: The more you charge it the higher you will boost upward, and the more damage and knock back the burst does

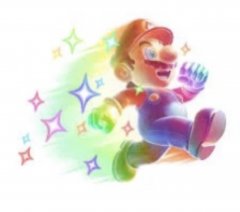
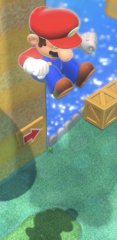
Final Smash: Mario pulls out and uses a Star, he becomes rainbow colored and quickly charges forward, when you hit at least one opponent it transitions into a cutscene of Mario quickly jumping up some platforms to hit a ? block at the top, a Mega Mushroom comes out turning Mario giant who then jumps down ground pounding his opponents blasting them away


IMG_6312.gif

 
Last edited:

Perkilator

Smash Legend
Joined
Apr 8, 2018
Messages
10,666
Location
The perpetual trash fire known as Planet Earth(tm)

  1. Default
  2. Red
  3. Blue
  4. Yellow
  5. Green
  6. Pink
  7. Black Valkyrie (black)
  8. Helmetless (special costume)
Intro: Valkyrie descends from the heavens while surrounded in a heavenly light.

Stance/Idle 1: Valkyrie stands upright, with her sword facing the floor while being pointed diagonally downward.
Idle 2: Valkyrie brushes her hair aside.
Idle 3: Valkyrie holds her sword up to her face.

Walk: Similar to Palutena’s walk.
Dash: Similar to Palutena’s dash.
Damage: Her damage animation from Valkyrie no Densetsu.
Jump: Similar to Palutena’s jump.
Crouch: Similar to Robin’s crouch.

Taunts
Up: Valkyrie raises her sword to the sky.
Side: Valkyrie puts her sword onto her shield in a defensive stance.
Down: Valkyrie briefly puts her sword away and puts her hand on her other arm.

Winposes
1: Valkyrie poses with Sandra and Sabine on each side of her.
2: Valkyrie and Sandra loosely mimic their respective animations from Valkyrie no Densetsu after obtaining a new weapon.
3: Sabine leaps on top of Valkyrie’s head before landing on the ground and running circles around Valkyrie.

Applause: Valkyrie claps for the winner.
Icon: Valkyrie’s helmet
Boxing Ring Title: The Warrior Maiden
Star K.O.: “Wuaaaah…!”
Victory Music: https://youtu.be/9JxRCoNC54Q?feature=shared
Kirby Hat: Valkyrie’s helmet and hair.
Jab: A 3-slash combo (3% each hit, small knockback)
Forward+A: Valkyrie stabs forward (7%, small knockback)
Up+A: Valkyrie stabs directly upward (7%, small knockback)
Down+A: A crouching, outward slash (5%, small knockback)
Dash Attack: Valkyrie Saber; a dashing upward crescent slash (11%, OK knockback)
Edge Attack: Valkyrie stabs along the ground as she climbs back up (8%, small knockback)
Get-Up Attack: Valkyrie slashes on each side of the floor (7%, small knockback)

Aerial Attacks
Air+A: Valkyrie spins around in wind magic with both arms extended (13%, OK knockback
Air Forward+A: A downward arcing slash (9%, small knockback)
Air Back + A: A backwards horizontal slash (11%, OK knockback)
Air Up+A: An overhead crescent slash (9%, small knockback)
Air Down+A: Valkyrie falls down and attacks using her rear end (15% with a meteor effect, OK knockback)

Smash Attacks
Forward+A: Valkyrie summons four miniature clones of herself to stab upward in front of herself (20%, medium knockback)
Up+A: Valkyrie stabs upward and unleashes a gust of wind (22%, medium knockback)
Down+A: Valkyrie stabs into the ground and unleashes a cyclone of fire (22%, medium knockback)

Grab Game

Grab: Bunshin; Valkyrie grabs the opponent using two miniature clones of herself.
Pummel: Valkyrie bonks the opponent with the hilt of her sword (1%)
Forwards+Throw: Sabine appears in front of Valkyrie and blasts the opponent with fire (9%, small knockback)
Back+Throw: The miniature clones of Valkyrie toss the opponent behind Valkyrie (7%, small knockback)
Up+Throw: Kurino Sandra appears and spins into the air (8%, small knockback)
Down+Throw: The miniature clones of Valkyrie surround the opponent and blow them up with a bomb (9%, small knockback)
B : Homing Shot; Valkyrie cuts through the air and fires three projectiles that home in on the nearest opponent (6% each, small knockback)
B + ← → : Through Shot; Valkyrie fires a drill-like projectile that, while only hitting once, ignores shields and goes through multiple opponents at once (14%, OK knockback)
B + ↑ : Wide Beam; Valkyrie performs an uppercut slash (13%, OK knockback) that fires a diagonally downward crescent projectile (5%, small knockback), followed by a diagonally downward diving stab (8%, small knockback)
B + ↓ : Bunshin; Valkyrie summons a miniature clone of herself that throws bombs for a bit before disappearing (13% each, OK knockback). The bombs bounce on the ground a couple times before exploding.

Final Smash: Ride of the Valkyrie; Valkyrie initiates an attack based on her Multiple Assault from Namco x Capcom (55%, devastating knockback). Any opponents exceeding 100% are instantly K.O.’d.
 

Perkilator

Smash Legend
Joined
Apr 8, 2018
Messages
10,666
Location
The perpetual trash fire known as Planet Earth(tm)

(Prototype footage and concept art used for reference)

  1. Player 1 (red)
  2. Player 2 (blue)
  3. Player 3 (yellow/black)
  4. Player 4 (green)
  5. Player 5 (orange)
  6. Player 6 (cyan)
  7. Player 7 (pink)
  8. Player 8 (purple)
CPU-controlled Puppet Fighters, which make up the new Multi-Man team, are always gray. Note that the Puppet Fighters in the Puppet Fighter Team are subject to normal Multi-Man Team behavior, which includes:
  • No specials
  • No grabs or throws
  • No Smash attacks
  • Can’t use items
  • Can’t shield or grab ledges
  • Very easy to launch
Intro: Puppet Fighter drops down, then detaches from strings and assumes a fighting stance.

Stance/Idle 1: Their idle animation from the prototype.
Idle 2: Puppet Fighter crosses their arms and looks in the opposite direction.
Idle 3: Puppet Fighter crouches slightly and thrusts an elbow.

Walk: Their walk from the prototype.
Dash: Their dash from the prototype.
Damage: Their damage animation from the prototype.
Jump: Their jump from the prototype.
Crouch: Their crouch from the prototype.

Taunts
Up: Puppet Fighter punches their right hand into their open palm, with electricity emitting from both hands.
Side: Puppet Fighter thrusts out their left arm and gestures for the opponent to come closer
Down: Puppet Fighter kneels while emitting a fiery aura.

Winposes
1: Puppet Fighter is seemingly absent from the victory stage, only to drop down from out of nowhere on puppet strings.
2: Puppet Fighter performs a 540 kick and then assumes a crouching fighting stance.
3: Puppet Fighter pumps their electrically-emitted fist and then crouches.

Applause: Puppet Fighter claps for the winner.
Icon: The Super Smash Bros. symbol.
Boxing Ring Title: Forgotten Slate
Star K.O.: The K.O. scream heard in the prototype.
Victory Music: A victorious remix of the Dragon King theme.
Kirby Hat: The Super Smash Bros. symbol.
Jab: Swift Combo; A one-two combo (1.5% each hit) followed by a either knee strike (5%, small knockback) or a flurry of punches (1% each hit)
Forward+A: A roundhouse kick that can be angled (9%, small knockback)
Up+A: An axe kick (11%, OK knockback)
Down+A: A legsweep (10%, OK knockback)
Dash Attack: A shoulder tackle (10%, OK knockback)
Edge Attack: Puppet Fighter pulls themself up from the ledge and kicks with their right leg (10%, OK knockback)
Get-Up Attack: A sweep kick on both sides (7%, small knockback)

Aerial Attacks
Air+A: An outward flying kick (10%, OK knockback)
Air Forward+A: A knee strike (11%, OK knockback)
Air Back + A: A dropkick (13%, OK knockback)
Air Up+A: A bicycle kick (10%, OK knockback)
Air Down+A: A screwdriver kick (13% with a meteor effect, OK knockback)

Smash Attacks
Forward+A: Wide-Range Attack; a downward swing with Puppet Fighter’s left hand, summoning a crescent of wind in front of them (20%, medium knockback)
Up+A: A jumping backflip kick (19%, medium knockback)
Down+A: Earthquake; Puppet Fighter punches the ground and creates a shockwave (18%, medium knockback)

Grab Game
Grab: Puppet Fighter reaches out with one hand.
Pummel: A knee strike (1%)
Forwards+Throw: Machine Gun; Puppet Fighter points at the opponent as sparks fly out of their index finger (8%, small knockback)
Back+Throw: Special Throw; Puppet Fighter turns around and performs an overhead throw (12%, OK knockback)
Up+Throw: Puppet Fighter holds the opponent up and uppercuts them (8%, small knockback)
Down+Throw: Volcano Kick; Puppet Fighter uses the G-forces to pin down the opponent before striking them with a fiery kick (13%, OK knockback)
B : Piercing Projectile; Puppet Fighter fires a laser from their head that goes through multiple opponents and deals considerable shield damage (13%, OK knockback)
B + ← → : Covering Fire; Puppet Fighter summons a falling rock from thin air (15% with a meteor effect, OK knockback). The rock appears from further away when the move is performed with a Smash attack input.
B + ↑ : Health Absorption; Puppet Fighter grabs the opponent and performs a multi-hit attack that heals them (2% each hit). The amount of damage healed is calculated as (Puppet Fighter’s current damage) minus (opponent’s current damage) = (damage healed). The grounded version catches opponents in midair, while the aerial version works like a mix between Captain Falcon’s Falcon Dive and Ganondorf’s Dark Dive.
B + ↓ : Landmine; Puppet Fighter places a mine that explodes if any fighter steps on it after it’s been set, including Puppet Fighter (18%, medium knockback). If used in the air, Puppet Fighter drops the mine, which falls like a rock.

Final Smash: Dragon King; Puppet Fighter extends their palm and creates a ring of fire that snares a single opponent (18%). If it connects, the opponent is suspended in midair as Puppet Fighter leaps into the air and falls down with an explosive kick (37%, far knockback) that instantly K.O.’s if the opponent is at 100% or higher.
 

ninjahmos

Smash Ace
Joined
Aug 12, 2018
Messages
853
Location
Noneya Business
Switch FC
SW-8579-4123-9016
Alright, here's my moveset for Lu Bu:

1. Default (Dynasty Warriors 2-5)
2. Shu (Green/Blue)
3. Wei (Blue/Purple)
4. Wu (Red/Orange)
5. Dynasty Warriors 7
6. Dynasty Warriors 8
7. Dynasty Warriors 9
8. Cyberpunk Armor
Intro: Lu Bu arrives on his horse Red Hare and dismounts.

Stance/Idle 1: His Idle stance from Dynasty Warriors 7/8 while in battle, with his halberd in his right hand.
Idle 2: Lu Bu holds his halberd with both hands.
Idle 3: Lu Bu spins his halberd with both hands and sets the other end of it on the ground in his right hand.

Walk: Lu Bu walks forward, halberd in one hand.
Dash: Lu Bu fiercely runs forward.
Damage: Damage animations from the Dynasty Warriors series.
Jump: Lu Bu's jump from the Dynasty Warriors series.
Crouch: Lu Bu crouches with one knee on the ground.

Taunts
Up: "You dare face the mighty Lu Bu?"
Side: "I have no time for the likes of you!"
Down: "I'll show you what True Might is!"

Winposes
1. "Can anybody provide me with a decent challenge?!" Lu Bu's victory pose from Dynasty Warriors 4.
2. "I am the Greatest Warrior of the Three Kingdoms!" Lu Bu swings his halberd a few times and strikes a pose.
3. "Did you really think you could take me on?" Lu Bu spins his halberd with both hands and sets the other end of it on the ground in his right hand.

Applause: Lu Bu will either clap for the winner or do his Defeated pose from Dynasty Warriors 5.
Icon: The Shin Sangoku Musou Emblem
Boxing Ring Title: The Avatar of Battle
Star K.O.: "Aaaaaaargh...!"
Victory Music: Victory Jubilee (Dynasty Warriors)
Kirby Hat: Lu Bu's hair and crown
Jab: Lu Bu does a wide swing to the left (3%), another swing to the right (3%), a frontal overhead swipe (4%), a round slash to the right while holding his left palm outward (5%), a spinning swing with his halberd held at a slightly lower angle (6%), a round angular swipe towards the front (7%), numerous criss-crossing swings done back and forth (8% each hit), then drives his halberd into the ground to create a powerful quake (9%, small knockback)
Forward+A: Lu Bu does a wide horizontal swing (7%, small knockback)
Up+A: A backward overhead swing (7%, small knockback)
Down+A: A small, crouching horizontal swing (5%, small knockback)
Dash Attack: His Dash Attack from Dynasty Warriors 5 (11%, OK knockback)
Edge Attack: Lu Bu swings his halberd vertically as he climbs back up (8%, small knockback)
Get-Up Attack: A back-and-forth swing on both sides of Lu Bu (7%, small knockback)

Aerial Attacks
Air+A: Lu Bu spins around with his halberd extended in one hand (13%, OK knockback)
Air Forward+A: A downward arcing swing (15% with a meteor effect, OK knockback)
Air Back+A: A backward horizontal swing (11%, OK knockback)
Air Up+A: An overhead swing (9%, small knockback)
Air Down+A: Lu Bu swings his halberd from underneath him (9%, small knockback)

Smash Attacks
Forward+A: Lu Bu does a heavy downward swing with his halberd (20%, medium knockback)
Up+A: A strong overhead swing (22%, medium knockback)
Down+A: A spinning horizontal swing across the ground (22%, medium knockback)

Grab Game
Grab: Lu Bu grabs the opponent with his free hand.
Pummel: Lu Bu knees his opponent (1%)
Forward+Throw: Lu Bu does a spin and tosses his opponent (7%, small knockback)
Back+Throw: Lu Bu turns back and tosses his opponent (7%, small knockback)
Up+Throw: Lu Bu tosses his opponent upward (4%) and quickly swings his halberd upward (8%, small knockback)
Down+Throw: Lu Bu slams his opponent into the ground (6%) and thrusts the end of his halberd into the opponent. (9%, small knockback)
B : Charge Attack; While on the ground, Lu Bu will release two flaming swings from his halberd while moving forward (6% each), then stomp the ground to create a bursting effect. (12%, OK knockback) If Charge Attack is done in the air, Lu Bu will give the ground a hard stomp (10%, OK knockback)

B + Side : Violent Thrust; Lu Bu will dash forward and thrust the end of his halberd like a lance (14%, OK knockback)

B + Up : Rising Halberd; Lu Bu will swing his halberd upward (12%, OK knockback) and jump high. If you press B again after doing Rising Halberd, Lu Bu will strike his opponent downward (12% with a meteor effect, OK knockback)

B + Down : Parry; Lu Bu will counter his opponent's attack with a downward strike from his halberd (13%, OK knockback)

Fighter Ability: Musou Gauge
Lu Bu will start each battle with an empty Musou Gauge. It can be filled up by attacking opponents or taking damage. If Lu Bu is at high damage (70% or more), or if he has the Final Smash, he'll be in True Musou mode. The gauge will slowly refill on its own, and the effects of the Musou Attack will be greater.

B : Musou Attack; Lu Bu will do a series of angled spinning slashes while jumping continuously, and end with a powerful ground slam. (30%, or 40% if Lu Bu is at 70% or higher, great knockback)

Final Smash: True Musou Attack - Spirit Bomb; Lu Bu lets out a roar before plunging his halberd forward at a slightly higher angle, conjuring a black vortex of energy surging with red electricity (55%, devastating knockback). This Final Smash will K.O. any opponents at 100% damage or more.
I've finally finished my moveset for Lu Bu.
 
Last edited:

Godzillathewonderdog

Smash Master
Joined
Jun 3, 2013
Messages
3,437
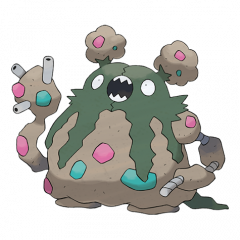
I’ve done it, I’ve made a moveset for the greatest newcomer choice, a character no one has the courage to bring up, the character Smash fans truly deserve.
IMG_6654.png
Here’s my moveset for Garbodor

I imagine Garbodor being about as big as Donkey Kong, having the slowest walk and run speed, and having a jump/double jump on par with Ganondorf, but makes up for it with strength and weight on par with Donkey Kong, several long ranged attacks, and the ability to deal poison damage (functions like the flower status).

I would like to point out that Garbodor has been shown in the anime to extend its arms to great lengths, which I used as inspiration for some of these moves, also Garbodor’s right arm is placed significantly lower than its right arm, so keep that in mind.

Jab: Straight punch with left arm

Forward Tilt: Swings right arm up in an arc

Up Tilt: Puts hands the on ground and slightly extends arms to attack with its head

Down Tilt: Sweeping motion with right arm, may cause the opponent to trip

Forward Smash: Extends both arms diagonally forward until both arms cross each other (roughly the length of Corrin’s forward smash)

Up Smash: Sticks its arms into it’s chest, then pulls out and lifts up a trash bag and crush’s it causing trash to burst out (5% chance of 3 food items coming out)

Down Smash: Puts hands on the ground and extends its arms lifting up its body, then slams down

Dash Attack: Trips and topples over in front of itself

Neutral Air: Swings left arm in a circle

Forward Air: Spits out a spray of acid that will travel a short distance before evaporating

Back Air: Swings right arm diagonally up behind it

Up Air: Swings left arm above its head in an arc

Down Air: Slams body down to the ground

Grab: Extends both arms straight forward to grab

Pummel: Expels bad breath from its mouth

Forward Throw: Holds opponent with left arm and punches with right

Back Throw: Swings opponent above and past its head then chucks them behind

Up Throw: Throws opponent straight upwards

Down Throw: Extends arms up then slams opponent down

Neutral Special: Does a pose bracing itself and absorbs projectiles into its body, if successful you can press the button again to spit out a toxic projectile that poisons the opponent, the more damage you absorbed the faster the poison deals damage and the longer it lasts (has a cap similar to the Lip’s Stick flower effect)

Side Special: Sticks out right arm and shoots poison from its protruding pipes, deals 5% damage, if the opponent is poisoned it deals double damage (this move will not poison the opponent)

Up Special: Extends arms diagonally up to grab ledge, if it grabs an opponent it will lunge towards them putting them in its body, the opponent will take gradual damage until they can break out, Garbodor can spit them out by pressing a button.

Down Special: Sets down a small toxic spike slightly in front of it, (can set down one at a time and will disappear over time) if an opponent walks on it they will be poisoned for a few seconds and the toxic spike will disappear, if the opponent is already poisoned when stepping on the toxic spike it will cause the poison to deal damage faster and it will last longer.

Final Smash: Transforms into its Gigantamax and unleashes a large wave of poison that will, you guessed it, poison opponents
This has been my favorite choice for the next “surprise” character, and I think I came up with a fairly fun concept for it.
 

ninjahmos

Smash Ace
Joined
Aug 12, 2018
Messages
853
Location
Noneya Business
Switch FC
SW-8579-4123-9016
I'm not sure if this has already been done before, but here's my moveset for Scorpion:

1. Default (Ultimate Mortal Kombat 3)
2. Sub-Zero (Blue)
3. Reptile (Green)
4. Smoke (Gray)
5. Ermac (Red)
6. Rain (Purple)
7. Tremor (Brown)
8. Inferno Scorpion
Intro: Scorpion appears out of a burst of flames.

Stance/Idle 1: His iconic stance from throughout the Mortal Kombat series (except the 3D Era)
Idle 2: Scorpion slightly rolls his shoulders.
Idle 3: His Hapkido stance from the 3D Era of Mortal Kombat.

Walk: Scorpion walks forward while maintaining his stance.
Dash: Scorpion runs forward, like in Ultimate Mortal Kombat 3.
Damage: Damage Animations from throughout the Mortal Kombat series.
Jump: Similar to Ryu and Ken's jump.
Crouch: Scorpion crouches like in the Mortal Kombat series.

Taunts
Up: Scorpion does his winpose from Mortal Kombat II.
Side: Scorpion emits flames from his hands.
Down: Scorpion pulls out his Rope Kunai.

Winposes
1. Scorpion raises his fist victoriously.
2. Scorpion does some flashy martial arts moves with flames and strikes a pose.
3. Scorpion uses his Spear move on the camera and pulls it towards him yelling "Get over here!"

Applause: Scorpion will clap for the winner.
Icon: Mortal Kombat Dragon Logo
Boxing Ring Title: Specter of Vengeance
Star K.O.: "Aaaaaaargh...!"
Victory Music: Victory (Mortal Kombat)
Kirby Hat: Scorpion's Mask
Jab: A quick one-two punch (2% each) and a high kick (4%, small knockback)
Forward+A: A front kick similar to Ryu and Ken's front kick (6%, small knockback)
Up+A: Scorpion does a close high punch (4%, small knockback)
Down+A: A crouching low kick (3%, small knockback)
Dash Attack: Scorpion does a short jump and a flaming spinning axe kick (6%, small knockback)
Edge Attack: Scorpion will do a fiery kip-up (9%, small knockback)
Get-Up Attack: Scorpion does a flaming Windmill (8%, small knockback)

Aerial Attacks
Air+A: Scorpion whirls his Rope Kunai around, similar to Simon and Richter's Neutral Air (6%, small knockback)
Air Forward+A: A diagonal kick (9%, small knockback)
Air Back+A: Scorpion whips his Rope Kunai behind him (again, similar to Simon and Richter) (12%, OK knockback)
Air Up+A: Scorpion does a flaming backflip kick (9%, small knockback)
Air Down+A: Scorpion does a diagonal punch from below him (15% with a meteor effect, OK knockback)

Smash Attacks
Forward+A: A spinning roundhouse kick (16%, OK knockback)
Up+A: An uppercut (17%, OK knockback)
Down+A: A sweep kick (16%, OK knockback)

Grab Game
Grab: Scorpion grabs his opponent with both hands.
Pummel: Scorpion knees his opponent (1%)
Forward+Throw: Scorpion lassos his opponent with his Rope Kunai (9%, small knockback)
Back+Throw: Scorpion does a back Throw, similar to Ryu (12%, OK knockback)
Up+Throw: Scorpion does a flaming uppercut (10%, OK knockback)
Down+Throw: Scorpion slams his opponent into the ground (8%, small knockback)
B : Spear; This iconic move lets Scorpion throw his Rope Kunai at his opponent. If it lands (8%), he'll yell "Get over here!" or "C'mere!" and pull his opponent towards him. You can use Spear to start combos or grab onto ledges.
Side + B : Leg Takedown; Scorpion uses his Scissor Leg Takedown move on his opponent (12%)
Up + B : Soaring Hellfire; Scorpion will launch himself up into the air with a fiery, rocket-like burst (16% with a meteor effect, OK knockback)
Down + B : Teleport Punch; Scorpion will teleport to the other side of his opponent and give them a diagonal punch (14%, OK knockback)

Final Smash: Toasty; Scorpion takes off his mask to reveal a flaming skull and breathes fire across the stage (50%, devastating knockback). This Final Smash will K.O. any opponents at 100% damage or higher.
 
Last edited:
Top Bottom