
- Game Versions
- Smash 3DS, Smash Wii U
Post-Writing note: I typed all of this down beforehand and this will NOT look as pretty as what other people can do (I'm new to this whole system of Spoilers to seperate stuff and making guides actually pretty detailed). I also am looking forwards to having some review pop up over this. However, you should also respect what I have done, as this was NOT easy to get down and required assistance from several people. Thanks to everyone who helped. And I'm so tired when finishing this up that I barely wanted to put any images - but I feel like with this length people deserved some images, amazing gifs, and funny gifs. So, I put in some from Melee and PM - Not enough Smash 4 ones to satisfy me. I can't help but sigh after all this as well, since I have had even less of a social life while working on this than normal. Guess genius comes at a cost? -A tired AkameZora, 10 days after starting this project
An Introduction To Why I'm Making This
Roy is a character that I only recently have started using to his fullest potential (in my eyes), and by god he is the most fun character in the entire cast, especially around my friends. While other characters rely on some gimmick to be good or have to play one specific playstyle, I’ve found Roy to be one of the most entertaining of them all as he can actually play more than just one way! Casually looking at you, Sheik and Zero Suit mains with your constant aggression!
But I’ve seen a ton of For Glory players, as well as several of my close friends, failing repeatedly at using the burning swordsman himself, and I feel the need to take it up into my own hands to create a guide for him that will cover almost every aspect of the Boy (I.e. the second worst Lord in the games, only second to his god awful father) that would need to be covered in a basic guide. This will cover all of his STANDARD attacks in as much depth (and probably too many words) as I can possibly shove into here.
So are you ready? If so, turn on Lunatic mode and let’s prepare to go insane here!
Anyone get it? No? Ok…….
Why TF Am I Playing Roy? I Main _________! (Insert Smash Character Here)
Now, I myself am a Little Mac main. And many others that might be viewing this guide, you probably will either be maining Roy, occasionally playing him, or be looking to pick him up since you like his design, have played any of the Fire Emblem games and don’t want to be called a weeaboo for picking up Robin (Don’t worry – I know those feels), or just want the ways of the Ph1r3. But EITHER WAY! It doesn’t matter WHY you want to play Roy, but it’s the fact you are attempting to learn that has already put you above practically all of the people I know in real life in terms of how much you are trying. So congratz to you!
Now, if you are new to Super Smash Bros, then welcome to a very nice community! Most of us here will attempt to get you through by shoving as many complicated formulas at you as possible then waiting to see how long it takes for you to make sense out of anything that we throw at you. No, seriously, getting into the community and learning all the lingo is harder that it looks, but eventually you’ll just begin to accept it and new terms will just come naturally to you. It does help if you have Aspergers such as I do at understanding things quickly, but I digress.
Who am I, and why the hell am I making a guide on Roy?
I’m literally just one of those random nobodies out in the middle of nowhereland called Indiana, using the tag AkameZora and probably will keep using it or I will swap to Zoramine Fae, attended only one Smash Bros tournament where I was knocked out during the pools (unfortuantly, had the tournament stacked against me with the #1 in my state and the #3 in Ohio if the people there weren’t kidding around, and based on their skill they weren’t) but did many friendly matches where I surprisingly was winning all of them. Won the first match in the pools against a pretty good R.O.B. main who just had too many issues with keeping me out, lost to a Samus/Sheik player who taught me to ban Dreamland every time now, and lost my cool for the next match after that and didn’t win a single round for the rest of the tour. Fortunately I recognized what was going on, took a drink then had fun against the best guy for my state. Still lost, but I had a good time.
As of recently I’ve started using Roy as a sort-of secondary and more of a character that I just attempt to have fun with, and I’ve begun to recognize that I’m doing rather well with him and find the character pretty darn fun. I started noticing (as you could tell above) that my friends were doing poorly with Roy, often holding still as I kept spacing them out and spammed Forward Smashes and Up Smashes akin to that of a For Glory Little Mac, but enough of a brain to not always approach me and didn’t Side B offstage. Since that’s kinda hard to do as Roy.
But I got tired of them being a bit, uh, terrible at a game that I consider to be almost an obsession for myself at this point, and after making two sub-par Little Mac guides I have decided to make myself a little guide for Roy over the course of about a week, maybe a bit more (? I’ll Update depending on when I actually finish this lol)
And you should forgive me – this WILL be wordy, and this WILL go over literally everything about Roy and his moves. And many of these are opinion based on whether they are bad or good moves, based around facts covering their information and purpose in his moveset. And as such, you should expect nothing less than three parts to almost every section of this barring the Grab/Pummel/Throw section, and maybe a few others: A factual portion in the first paragraph, the second being why it’s a good move or option or anything and how to properly use it, and the third for the downfalls of a specific move and then my general opinion over it. And I myself don’t main Roy, instead I main Little Mac, so specific things related to Roy might be out of my general thought process.
But this isn’t a guide about my whole damn life story, this is a guide about a swordsman with a fiery blade, the person who everyone keeps saying is a clone of Marth but is only a semi-clone, and the Lord with a ranged sword that ain’t called a Levin, so let’s get this started.
Heh… Fire Emblem jokes… Maybe someone will get them…
Tactician Training: Roy Basic Information all New Players should Know
Roy’s got several awesome attributes about him that make him one of the most fun characters in the game. Unlike Marth, who is at his strongest at the tip and gives money at restaurants, Roy is strongest at the base and only gives money to army camps.
Bad jokes aside, the Sweetspot allows him to play extremely aggressively, something Marth can only wish to be able to do, and he has enough movement to be able to do this perfectly. His short hop height also works well to his favor, and almost all of his standard attacks and aerials have very little lag to them or have power to make up for it.
Of course Roy has problems; otherwise He’d be above Marth. His sword has less range than Marth’s and the Sourspot of his blade is pitifully weak. He struggles against projectiles, especially Needles and Link’s entire character design, and has problems around approaching across ground that doesn’t allow jumps. His combos barely connect at early percents and don’t rack up as much damage as you’d wish, and while all of his throws have some use, they aren’t as useful as they could possibly be for the jobs that they preform. Overall Roy is a heavily aggressive-based character by most people’s standards and relies on his speed and power in order to quickly finish stocks, often using reads in order to do so.
First Off, the Word Key
I’m not expecting you all to be geniuses when reading this, so here will be a key for important terms that most Smash players should know if they are interested in learning a character in-depth enough to require a guide or to play competitively. If you know competitive terms and are just looking for what to do with Roy’s attacks, skip down to Standard Grounded Attacks. Makin your life easier here peoples.
The Sweetspot Effect: Basically the Doppler Effect But Not Really
For all you non-sciency and non-studious people out there (Since I’m assuming many people don’t know what it is), the Doppler Effect simplified is the effect where the closer you are to a source, the stronger it is, but the farther away you are the weaker it is. This is practically personified, or swordified, within his Sword of Seals, which deals more damage and hitstun if you hit opponents with the very hilt and base of the blade, but does next to nothing at the tip. While at first this might seem like a hinderance, as you HAVE to approach opponents, where you would be correct in that, it is also a blessing in disguise, as Roy’s very good movement options and ability to run in then run away for quick damage makes him very adept at controlling space and putting pressure on opponents with a variety of strong, fast attacks.
Weaker moves in Roy’s moveset still can do a heavy amount of damage if hitting with the tipper. For example, Roy’s Forward Smash’s tip uncharged deals a measly 13% but a base blade hit does 20%. uncharged. And then you add in the bonus knockback from fully charging as well as damage and you have something more akin to dropping a piece of C4 into a character’s moveset then calling it ‘Balanced’. Or giving a character the ability to have absolutely no lagless moves and a 50/50 chance to kill an opponent off a throw. Or the ability to slow down time!......
I think you get at what I’m talking about here.
But it isn’t that great, despite how good this looks on paper. By you have to hit close with the blade you HAVE TO HIT WITH THE HILT – you can barely space with any of his attacks due to a poor amount of hitstun at the tip, and hitting tipped attacks causes next to no shieldstun and basically a free shieldgrab or punish with whatever the opponent wants. Campy characters such as Link, Toon Link, Duck Hunt, and patient Sheiks can merely run away from Roy then keep him out with their projectiles, forcing him to play heavily aggressive to the point of being able to mistakes, where they can get free punishes.
Sort of a double-edged sword, to use a pun and analogy together – while the Sweetspot is great and all, there are massive downsides you must pay in order to have such a powerful tool at your disposal. And Roy players must learn to quickly adapt to this playstyle, or build entirely different ways of playing using this tip, in order to be successful in the long run.
Standing Movement, Aerial Movement, Jumps, And Some Other Important Stuff But Only Basics
One of the many things that Roy has going for him as a character is his very good movement overall. He has the 9th fastest running speed in the game and has the fourth best aerial movement speed. His Falling Speed is also tied for 5-8th, and Fast Fall is 6-9th. These traits all combine together to turn Roy into the perfect rushdown character, capable of running in, dishing out a hefty amount of damage very quickly with sweetspotted attacks then run away whenever it is necessary to do so. This also is actually pretty frustrating, however, if you played Marth for a while or slower, more punish-based characters, as you will feel like you can be aggressive as you want when in reality you must pick and choose when you should approach your opponent and start reading them.
Roy’s Playstyles
Roy is a quite diverse introduction into the cast, as he seems to have only one particularly excelling way to play as him; aggressively, punishing opponents and forcing them into corners so they make mistakes. As Kuroganehammer, the place where much of the frame data that I use on a daily basis is found, has stated his playstyle, it is pretty much akin to the term of ‘Dominating.’ If your opponent lets you approach, then approach them. If they let you hit them, hit them. If they make one single mistake that can cost them the match, take advantage of it and force them to eat every single last ounce of sword that you have.
Now, many players play by that doctrine. And it’s a really good one, honestly. And if I hadn’t learned how to use Roy in my own playstyle or didn’t already try to mix up how I played a lot of the cast I’d probably have done so myself. However, I’ve also found that Roy has a very good punishing game and I have begun to play him similarly to how people play Ganondorf and Bowser: a heavy-hitting bait and punish character who relies on opponents approaching instead of themselves approaching unless they have to. I personally have found this to be a much more interesting way to play as the Blazer, but that’s just up to personal opinion on whether or not you want to do that.
You can choose either of these and go on a spree, but you must play at the top of your ability if you plan on ever attending a tournament such as a major or a statewide tournament. At local tournaments that aren’t important, then bringing Roy probably will get you pretty far. On the other hand, if you expect anything good to come out of fighting people like Nairo, Zero, and Dabuz by using a subpar Roy that only knows how to use Double-Edged Dance and Neutral Air… Have fun, bro.
The Trusty Rapier: Roy’s Standard Attacks

Roy’s ground game is pretty eh, but that’s probably just me and my biased Little Mac opinion. He often is stuck on the ground since he has an issue with getting comboed in the air due to his fastfalling nature. Thankfully, most of his grounded attacks are either fast or do a hefty amount of damage, but none of them really have that type of oomph to make any of them particularly special. Outside of his Forward Smash, but that’s later on in the guide and you can read that section for yourself. While his grounded game might not be the best around, learning each and every character’s ground game is vital to their playstyle, and as such it probably is best to understand each move so you can get a feel for it yourself.
A Rexacalibur with Infinite Uses: Standard Aerial Attacks

Roy’s aerial attacks are where he begins to truly shine, as each one has a purpose for existing and each can he used in a standard match without having to put a very heavy amount of risk on the line (Barring Down Air, but that’s kinda the purpose of that move.) He uses his aerials commonly either for approaching, retreating, or just to stuff opponents out, especially ones like Fox and Pikachu that can easily get in a grab or a few hits then retreat away in order to prevent them from doing as they please. Hell, I’d say a Roy player could most likely win by using ONLY his aerials because of how good they are. All of them have been buffed to have reduced landing lag, and due to his fast faller nature he can easily use SHFF (read Neutral Air for that) Neutral Airs, Forward Airs, Back Airs, and Up Airs all he wants and opponents will be hard-pressed to find a free opportunity if you hit them with the sweetspot of the attack on their shield. Unless they are Sheik. ‘Cuz eff Sheik.
The only problem with his aerials is, well, the fact they ARE aerials – they put yourself directly above your opponent and in the line of fire for every single up smash in the entire game and can get juggled easily due to your fast falling speed and his aerials short range and requirement to be within point-blank distance in order to do the necessary damage. They are moderate-risk, high-reward attacks that often do enough damage to offset the fact you have to commit to doing it when going in.
No Clue How To Title This: Roy’s Grab, Pummel, and Throws

(There was no good Roy grab GIFs and I wasn't in the mood to do another.)
Roy’s grab, despite only being a subpar grab with below-average throws, is one of his most useful tools, considering the fact his standard attacks have massive shield problems when hitting any of them. It is a basic forwards lunge with below-average range, and all of his throws involve him either throwing his opponents in a direction or him kicking them away. They aren't bad, nor is Roy's grab all that bad or his pummel, but the fact that they could be significantly better means that there was a problem with designing them.
They do have one massive use, though, and, as stated above, is that they can grab through shields - this means that all that unsafeness is taken away and replaced with you being put into an instantaneous advantage state by using a throw. Just, don't whiff these, OK?
The Sword of Seals- Roy Special Attacks
Roy’s Specials aren’t much to speak about; Flare Blade is pretty situational for its best use but can be useful in the neutral, Double-Edged Dance is basically Dancing Blade except more reliable and damaging, Blazer is a good kill move but a rather average to below average recovery move and Counter is… Well, a counter move. And each one has a specific purpose in his moveset - even if Roy doesn't even get a Counter skill in Binding Blade.
Critical Astra: Roy Combos and Strings
 (Yes, that actually is Astra.)
Roy doesn’t have many true combos that last more than two attacks, but he has a few strings and one or two combos thrown in there that work at rather low percents or are killing ones. Many of them can also be escaped by inputting with good Smash DI and good DI overall, so be wary about the percentages listed on those that are.
If variables are listed, they are based around Level 9 CPUs DIing in Training mode. So, they might work earlier or later depending on human AI.
Taking Advantage of the Forests: Playing Roy Tips and Tricks

After viewing the most popular Palutena guide out there, I have decided that a section covering one of the most important things about Roy, which is actually PLAYING as Roy and not just how to implement Roy’s moves into your gameplay. Having knowledge of your moves is great and all, but you will get nowhere unless you know your fundamentals. And that’s where this portion shall come in handy, which covers how to play with Roy during an actual match and not during training.
Going Deeper into Bern: Roy Advanced Techniques

Roy is a character that on paper looks basic and almost one directional, with a basic approach consisting of Neutral Airs, Forward Airs, and Dash Attacks if you wish to play risky. And some players do play like that, doing only the same strategies over and over, expecting it to work. However, in the competitive scene, knowing only your fundamentals will only get you so far against opponents willing to use every technique to their advantage. And as such, knowing each of these, how to counter them, and when to use them in your gameplay will help you succeed as a Roy player.
And still, don't worry about not learning these right off the bat and immediately once ou start playing him. I can barely do any of these right now myself despite knowing about them, and even I'm still learning.
Tactician Studying The Terrain: Roy’s Matchups and Best/Worst Stages
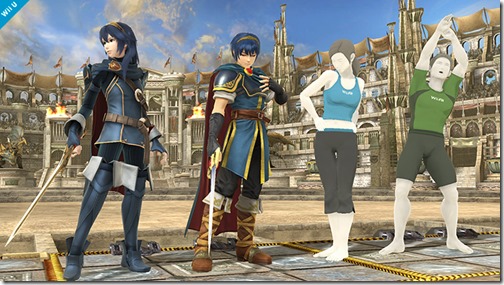
"Why am I here? Whatever, Let's just stretch!" -Male Wii Fit Trainer, 2016
Roy loves having situations good in his favor, being one of the lesser characters in Smash 4. However, there are specific situations in which he shines best; and many of these are due to the matchups that Roy can excel in. He doesn’t have many of these, but when those occur he can wreak havoc on an opposing player, mentally and physically. And this does NOT mean you get to shine on the 'physical' aspect, Wii Fit Dummy >.>
Things below will only cover good, neutral, and bad matchups, and knowledge I have gotten from others and my very bare knowledge of Smash 4 legal stages.
Thank you for, if you have managed to read through all of this and NOT passed out or taken more than fifteen days! This has taken me a LOT of my free time to test things out, ask around, get access to a friend's Wii U for a short time to do extra testing on, several 3DS hours into Training, with Friends, and on For Glory just seeing if what I had listed could be put into an actual match. And this also couldn't have been possible without my two absolute best friends IRL, Benny and Robert, for 1. Giving me the idea to make this guide by sucking at Roy, 2. Being there to give me basically target practice when I was testing stuff as Roy, and 3. Being good friends overall. Thanks, all of ya.
AkameZora, out.
...And a few minutes later I'll be told I screwed something up, knowing my luck.........
An Introduction To Why I'm Making This
Roy is a character that I only recently have started using to his fullest potential (in my eyes), and by god he is the most fun character in the entire cast, especially around my friends. While other characters rely on some gimmick to be good or have to play one specific playstyle, I’ve found Roy to be one of the most entertaining of them all as he can actually play more than just one way! Casually looking at you, Sheik and Zero Suit mains with your constant aggression!
But I’ve seen a ton of For Glory players, as well as several of my close friends, failing repeatedly at using the burning swordsman himself, and I feel the need to take it up into my own hands to create a guide for him that will cover almost every aspect of the Boy (I.e. the second worst Lord in the games, only second to his god awful father) that would need to be covered in a basic guide. This will cover all of his STANDARD attacks in as much depth (and probably too many words) as I can possibly shove into here.
So are you ready? If so, turn on Lunatic mode and let’s prepare to go insane here!
Anyone get it? No? Ok…….
Why TF Am I Playing Roy? I Main _________! (Insert Smash Character Here)
Now, I myself am a Little Mac main. And many others that might be viewing this guide, you probably will either be maining Roy, occasionally playing him, or be looking to pick him up since you like his design, have played any of the Fire Emblem games and don’t want to be called a weeaboo for picking up Robin (Don’t worry – I know those feels), or just want the ways of the Ph1r3. But EITHER WAY! It doesn’t matter WHY you want to play Roy, but it’s the fact you are attempting to learn that has already put you above practically all of the people I know in real life in terms of how much you are trying. So congratz to you!
Now, if you are new to Super Smash Bros, then welcome to a very nice community! Most of us here will attempt to get you through by shoving as many complicated formulas at you as possible then waiting to see how long it takes for you to make sense out of anything that we throw at you. No, seriously, getting into the community and learning all the lingo is harder that it looks, but eventually you’ll just begin to accept it and new terms will just come naturally to you. It does help if you have Aspergers such as I do at understanding things quickly, but I digress.
Who am I, and why the hell am I making a guide on Roy?
I’m literally just one of those random nobodies out in the middle of nowhereland called Indiana, using the tag AkameZora and probably will keep using it or I will swap to Zoramine Fae, attended only one Smash Bros tournament where I was knocked out during the pools (unfortuantly, had the tournament stacked against me with the #1 in my state and the #3 in Ohio if the people there weren’t kidding around, and based on their skill they weren’t) but did many friendly matches where I surprisingly was winning all of them. Won the first match in the pools against a pretty good R.O.B. main who just had too many issues with keeping me out, lost to a Samus/Sheik player who taught me to ban Dreamland every time now, and lost my cool for the next match after that and didn’t win a single round for the rest of the tour. Fortunately I recognized what was going on, took a drink then had fun against the best guy for my state. Still lost, but I had a good time.
As of recently I’ve started using Roy as a sort-of secondary and more of a character that I just attempt to have fun with, and I’ve begun to recognize that I’m doing rather well with him and find the character pretty darn fun. I started noticing (as you could tell above) that my friends were doing poorly with Roy, often holding still as I kept spacing them out and spammed Forward Smashes and Up Smashes akin to that of a For Glory Little Mac, but enough of a brain to not always approach me and didn’t Side B offstage. Since that’s kinda hard to do as Roy.
But I got tired of them being a bit, uh, terrible at a game that I consider to be almost an obsession for myself at this point, and after making two sub-par Little Mac guides I have decided to make myself a little guide for Roy over the course of about a week, maybe a bit more (? I’ll Update depending on when I actually finish this lol)
And you should forgive me – this WILL be wordy, and this WILL go over literally everything about Roy and his moves. And many of these are opinion based on whether they are bad or good moves, based around facts covering their information and purpose in his moveset. And as such, you should expect nothing less than three parts to almost every section of this barring the Grab/Pummel/Throw section, and maybe a few others: A factual portion in the first paragraph, the second being why it’s a good move or option or anything and how to properly use it, and the third for the downfalls of a specific move and then my general opinion over it. And I myself don’t main Roy, instead I main Little Mac, so specific things related to Roy might be out of my general thought process.
But this isn’t a guide about my whole damn life story, this is a guide about a swordsman with a fiery blade, the person who everyone keeps saying is a clone of Marth but is only a semi-clone, and the Lord with a ranged sword that ain’t called a Levin, so let’s get this started.
Heh… Fire Emblem jokes… Maybe someone will get them…
Tactician Training: Roy Basic Information all New Players should Know
Roy’s got several awesome attributes about him that make him one of the most fun characters in the game. Unlike Marth, who is at his strongest at the tip and gives money at restaurants, Roy is strongest at the base and only gives money to army camps.
Bad jokes aside, the Sweetspot allows him to play extremely aggressively, something Marth can only wish to be able to do, and he has enough movement to be able to do this perfectly. His short hop height also works well to his favor, and almost all of his standard attacks and aerials have very little lag to them or have power to make up for it.
Of course Roy has problems; otherwise He’d be above Marth. His sword has less range than Marth’s and the Sourspot of his blade is pitifully weak. He struggles against projectiles, especially Needles and Link’s entire character design, and has problems around approaching across ground that doesn’t allow jumps. His combos barely connect at early percents and don’t rack up as much damage as you’d wish, and while all of his throws have some use, they aren’t as useful as they could possibly be for the jobs that they preform. Overall Roy is a heavily aggressive-based character by most people’s standards and relies on his speed and power in order to quickly finish stocks, often using reads in order to do so.
First Off, the Word Key
I’m not expecting you all to be geniuses when reading this, so here will be a key for important terms that most Smash players should know if they are interested in learning a character in-depth enough to require a guide or to play competitively. If you know competitive terms and are just looking for what to do with Roy’s attacks, skip down to Standard Grounded Attacks. Makin your life easier here peoples.
Tilt- When walking forwards, crouching, or holding up (If you play without Tap Jump, this becomes significantly easier), hit A. This will do a Tilt, instead of a Smash attack which is done by flicking the directional stick in a certain way. Tilts have less damage and knockback than Smashes, but are much faster and cannot be charged. Left in here for a friend who knew nothing about tilts before I mentioned to him about it.
DI – Directional Influence, where you hold a certain direction when being hit, for example holding right when being launched left, in order to reduce knockback taken or to change the angle to survive better. When launched upwards, most players DI to the left or right to increase the distance you have to travel instead of DIing down.
Read – To predict an action that an opponent will do before they preform it. For example, if you think your opponent will roll behind you and charge a forward smash and you hit him, it is called a ‘Good’ read. However, a ‘Bad’ read is when you roll INTO one of those Forward Smashes. Don’t ask, I get confused as well.
Combo – A series of attacks that is inescapable. Very rare except for some 2 or 3 attack strings, Roy has almost none of these but characters such as Sheik are ridiculous and ones for other characters such as Mario are equally as insane, if not worse.
String – A series of attacks that opponents can escape from but generally will connect if opponents don’t expect it. They are much more common in Smash 4 than in other Smash titles, and Roy has several of these.
Blastzone – The edges of the screen where the ‘blast’ from you getting KOed will appear. Often mentioned for kills ‘near the blastzone’ as they would kill earlier than if you were farther from it.
Tech – When you are hit hard enough, characters are sent into a ‘tumbling’ state. If they land like this, they will bounce off the floor then land on their faces, where they can then press a direction to roll in a direction, up to get up in place, or hit A to attack in place. Hitting Shield or inputting a roll within a few frames of landing will do said action immediately, called a Tech. You can only do the Shield Tech when hitting walls, which is uncommon in competitive formats anyways due to stage restrictions. If you can predict where an opponent will go after a tech, it is called a tech chase and lets you punish your opponents for doing so. In other games, similar techniques are called ‘Ukemi’s.
Hitstun/Shieldstun – When you hit an opponent, the hitstun and shieldstun is the amount of frames before a character can do an attack out of their knockback or shield. Really basic. Roy’s attacks do more hitstun and shieldstun with their Sweetspot, so keep that in mind.
‘Lag,’ Endlag, FAF, and Landing Lag – Lag is the term used to explain the time between the active frames of an attack, and when you can input another attack - in other words, the dead time. Opposing characters can punish you during these frames, so you must be wise about what moves to use based around their endlag. FAF, or First Actionable Frame, is the specific frame that a character can do an action out of, well, the attack. Landing Lag is special, however – It is a set frame on all aerial attacks baring Special moves where, if you land before then, you will suffer a few frames of doing absolutely nothing upon landing. Roy, in specific, has little endlag on most of his Aerials, but their autocancel frames are late and only available in a Full Hop.
Autocancel – For those wondering what the heck an Autocancel is, it is the frame that, when after an aerial is used and you land, that the attack will have no frames of landing lag. The Autocancel and FAF frame are different between all attacks, so try experimenting around to figure this out.
Pivot- A ‘technique’ that I define as dashing in one direction then turning around, allowing you to do a forward tilt in the opposite direction of where you were dashing during the turning and skidding animation. Perfect Pivots are done by dashing forwards then within a very select time (<10 frames) you must input another dash in the opposite direction, which is very limited due to how precise you must be. However, mastering Perfect Pivots gives you significantly more range on everything, since you are put into a standing position a few inches forwards and can act instantly out of a pivot with anything you want.
Short Hop and Full Hop – Short hops are done by tapping the Jump button and Full Hops are done by holding it down. Short Hops are better for quickly letting out one aerial close to the ground while Full Hops are often done to chase down aerial opponents.
Fast Fall & SHFF: Fast Falling is a technique that has become very useful for landing quicker than usual. It increases a character’s falling speed by 60% (With two exceptions to this rule: Link’s is increased to 90%, and Ryu’s is decreased to 40%.) and adds two extra frames of landing lag (about that much, rough estimate) ONLY if you do empty jumps – if you don’t Fast Fall, you have 2 frames of Lag, while you have 4 Frames if you Fast Fall.Roy is an exception to this rule along with a few other characters, having 5 frames of landing lag SHFF, or Short Hop Fast Fall, allows you to use Aerials and land as fast as possible with your character and is often used as a means of approaching opponents while keeping an hitbox active, usually with Neutral Aerials for Roy.
‘Tomahawk’ – When you do a short hop forwards and do no attack during this, called an ‘empty’ jump due to there being no attack. This allows you to immediately grab upon landing, especially if opponents think you will use a Neutral Air and hold their shield down.
Sweetspot and Sourspot: The strong and weak points of an attack. See below for more details on Roy’s Sourspot and Sweetspot.
The Sweetspot Effect: Basically the Doppler Effect But Not Really
For all you non-sciency and non-studious people out there (Since I’m assuming many people don’t know what it is), the Doppler Effect simplified is the effect where the closer you are to a source, the stronger it is, but the farther away you are the weaker it is. This is practically personified, or swordified, within his Sword of Seals, which deals more damage and hitstun if you hit opponents with the very hilt and base of the blade, but does next to nothing at the tip. While at first this might seem like a hinderance, as you HAVE to approach opponents, where you would be correct in that, it is also a blessing in disguise, as Roy’s very good movement options and ability to run in then run away for quick damage makes him very adept at controlling space and putting pressure on opponents with a variety of strong, fast attacks.
Weaker moves in Roy’s moveset still can do a heavy amount of damage if hitting with the tipper. For example, Roy’s Forward Smash’s tip uncharged deals a measly 13% but a base blade hit does 20%. uncharged. And then you add in the bonus knockback from fully charging as well as damage and you have something more akin to dropping a piece of C4 into a character’s moveset then calling it ‘Balanced’. Or giving a character the ability to have absolutely no lagless moves and a 50/50 chance to kill an opponent off a throw. Or the ability to slow down time!......
I think you get at what I’m talking about here.
But it isn’t that great, despite how good this looks on paper. By you have to hit close with the blade you HAVE TO HIT WITH THE HILT – you can barely space with any of his attacks due to a poor amount of hitstun at the tip, and hitting tipped attacks causes next to no shieldstun and basically a free shieldgrab or punish with whatever the opponent wants. Campy characters such as Link, Toon Link, Duck Hunt, and patient Sheiks can merely run away from Roy then keep him out with their projectiles, forcing him to play heavily aggressive to the point of being able to mistakes, where they can get free punishes.
Sort of a double-edged sword, to use a pun and analogy together – while the Sweetspot is great and all, there are massive downsides you must pay in order to have such a powerful tool at your disposal. And Roy players must learn to quickly adapt to this playstyle, or build entirely different ways of playing using this tip, in order to be successful in the long run.
Standing Movement, Aerial Movement, Jumps, And Some Other Important Stuff But Only Basics
One of the many things that Roy has going for him as a character is his very good movement overall. He has the 9th fastest running speed in the game and has the fourth best aerial movement speed. His Falling Speed is also tied for 5-8th, and Fast Fall is 6-9th. These traits all combine together to turn Roy into the perfect rushdown character, capable of running in, dishing out a hefty amount of damage very quickly with sweetspotted attacks then run away whenever it is necessary to do so. This also is actually pretty frustrating, however, if you played Marth for a while or slower, more punish-based characters, as you will feel like you can be aggressive as you want when in reality you must pick and choose when you should approach your opponent and start reading them.
Roy’s Playstyles
Roy is a quite diverse introduction into the cast, as he seems to have only one particularly excelling way to play as him; aggressively, punishing opponents and forcing them into corners so they make mistakes. As Kuroganehammer, the place where much of the frame data that I use on a daily basis is found, has stated his playstyle, it is pretty much akin to the term of ‘Dominating.’ If your opponent lets you approach, then approach them. If they let you hit them, hit them. If they make one single mistake that can cost them the match, take advantage of it and force them to eat every single last ounce of sword that you have.
Now, many players play by that doctrine. And it’s a really good one, honestly. And if I hadn’t learned how to use Roy in my own playstyle or didn’t already try to mix up how I played a lot of the cast I’d probably have done so myself. However, I’ve also found that Roy has a very good punishing game and I have begun to play him similarly to how people play Ganondorf and Bowser: a heavy-hitting bait and punish character who relies on opponents approaching instead of themselves approaching unless they have to. I personally have found this to be a much more interesting way to play as the Blazer, but that’s just up to personal opinion on whether or not you want to do that.
You can choose either of these and go on a spree, but you must play at the top of your ability if you plan on ever attending a tournament such as a major or a statewide tournament. At local tournaments that aren’t important, then bringing Roy probably will get you pretty far. On the other hand, if you expect anything good to come out of fighting people like Nairo, Zero, and Dabuz by using a subpar Roy that only knows how to use Double-Edged Dance and Neutral Air… Have fun, bro.
The Trusty Rapier: Roy’s Standard Attacks
Roy’s ground game is pretty eh, but that’s probably just me and my biased Little Mac opinion. He often is stuck on the ground since he has an issue with getting comboed in the air due to his fastfalling nature. Thankfully, most of his grounded attacks are either fast or do a hefty amount of damage, but none of them really have that type of oomph to make any of them particularly special. Outside of his Forward Smash, but that’s later on in the guide and you can read that section for yourself. While his grounded game might not be the best around, learning each and every character’s ground game is vital to their playstyle, and as such it probably is best to understand each move so you can get a feel for it yourself.
Jab
Roy’s Jab is one of the more interesting ones for me to look at, as unlike the rest of the cast it holds its uses not in spacing out the opponent, but instead fits the role of a very useful combo starter that comes out very quickly. Coming out as early as Frame 5 and a FAF frame (First Actionable Frame, in other words how fast you can do anything else out of an attack) of 23, it is probably the single most useful Jab in the game based on the character it is, while I personally think Little Mac’s Jab is the best in the game, but the character already has enough good grounded moves that Jab kinda gets overshadowed.
Its main use comes in the fact it can link directly into a Down Smash, Forward Smash, Up Tilt, Forward Tilt, Down Tilt, Double-Edged Dance, Blazer, or uncharged Flare Blade. In other words, pretty much his entire moveset. It lets you quickly rack up damage with Jab-Up Tilt-Up Tilt-Up Air for a free damage combo that from testing is rather hard to escape from, since if you airdodge you get caught by another Up Tilt and jumping away can get caught by an Up Air. Jab also provides Roy with his fastest OOS option, barely 1 frame faster than the earliest hitboxes of Down Smash and Up Tilt, and provides much more utility than those two can for putting on pressure yourself, which is the entirety of how Roy can even function as a character. It also can pressure shielding opponents into anticipating a reaction and doing something else, as remaining in shield can result in multiple Jabs and Down Tilts or a grab, which can convert into heavy damage if reads are involved.
If you don’t want to simply do damage at a low to high percent, just dash forwards and grab them. This lets you use Down Throw for kills, Forward Throw to chuck opponents offstage if they do a ledge getup, or Up Throw for killing. It will work even at absurdly high percents against some characters, specifically fastfallers and characters with large hitboxes, and the Grab will usually connect to the point where pummeling three or so times then Up Throwing will kill. For example, Fox still gets grabbed past 200% despite dying to Up Throw around 160%.
It does have its downsides, though. Sadly. Unlike other Jabs such as Mario’s, Cloud’s, and even Duck Hunt’s, this Jab barely puts any distance between you and your opponent. While this might not seem all that bad, it makes escaping from a disadvantageous state extremely difficult without reading a bad reaction from the opponent due to it not keeping them away. Jab doesn’t help Roy’s main problem with projectile campers since it does nothing to assist in keeping them from doing anything, and at higher percents (around 100-110%) follow-ups start to disappear due to the knockback on the attack.
Overall Roy’s Jab is probably his best move to just throw out in the neutral, and can be extremely useful on hit and isn’t that bad on block. I’d say that it’s probably Roy’s most useful tool in his entire arsenal, but don’t quote me on that – I’m just a poor Little Mac main!
Forward Tilt
The poor forgotten Forward Tilt lies here within Roy’s moveset, and despite the fact on paper it looks really good (and has managed to make me get the Sandbag to go past 10000 ft. in the Home-Run Contest, lol), it in reality is just a sub-par move. It is quite fast, coming out on Frame 8, lasting for three frames, then having the earliest actionability frame at Frame 32, just over half a second, it actually has quite good speed for the range and damage that it can deal. The sourspot of the attack deals 9% while the sweetspot deals 12%, has a ton of hitstun for absolutely no reason whatsoever, and has increased knockback. It actually does reliably kill opponents around the 150% range at maximum for the heavyweights and 130% for the upper Middleweights. While not as strong as, say, the explosive power of a fully charged Flare Blade or his Forward Smash, Forward Tilt is a more consistent killing option since you don’t have to get a read or break a shield to hit one of them.
Outside of Down Tilt and occasionally Jab as well as Neutral Air, Forward Tilt is Roy’s best get-the-frick-off-me tool in his entire moveset, covering a wide arc in front of him. While not the length of Marth’s, Roy’s has less range in return for more reliability at stuffing rushdown characters and overall working more effectively towards what it was meant to do. Marth’s entire moveset was designed specifically for the purpose of keeping opponents away and getting great spacing; Roy’s was not.
Forward Tilt also combos directly out of Jab at early percents against midweight and heavyweight opponents as well as fastfallers, although the latter two can DI down at early percents and shield the Forward Tilt then punish as they please. It stops working around the 30-40% range for most characters, especially if they DI away. Forward Tilt also can stuff ledge getups past 100%, as many of them will be slow enough for you to react, shield, then Forward Tilt for an easy kill.
Problems begin to arise quickly once you start looking at its flaws. While Forward Tilt is fast, it isn’t anywhere close to the speed of Roy’s Down Tilt or Jab, which are superior spacing tools and have more utility after hit than Forward Tilt. While its FAF frame does give you a bit of leeway when missing, faster characters such as Sheik and Captain Falcon can just run up to you and dashgrab right after a whiffed or blocked Forward Tilt, as even the added hitstun from the Sweetspot won’t save you when you can’t even get off the damage and STILL get punished for it. Overall, Forward Tilt is an average move with moderate usage, and can be used in the neutral to stuff out approaching characters while still being powerful and fast, without the cost of staling any of your more powerful killing options such as Smashes.
Up Tilt
Roy’s Up Tilt is actually similar in vein to his Forward Tilt, but with many more applicable moments for it to shine. Coming out at its maximum earliest at frame 6 from the front and ending several frames later from behind, Up Tilt covers every single area of Roy’s body and is, of course, a disjoint, functioning like Cloud’s Up Tilt for everyone who is reading this (We ALL know everyone has a Pocket Cloud. Who doesn’t!?) except for the fact it has more range. At early percents, this attack can link into itself (although at 0% your opponent most likely will be able to DI down and shield after the first) as well as later percents connecting into Up Air strings, a Forward Air, Neutral Air, or Back Air.
Up Tilt has a rather wide variety of uses, especially during the neutral game due to it covering his entire hitbox. Against rushdown opponents that love aerial approaches such as Fox and Pikachu (excluding against those two if they projectile camp a lot), Up Tilt can stuff them out better than it can grounded approaches but still can do well against grounded ones as well. As a linker, if you read an airdodge on a Down Throw you can initiate Up Tilt and Up Air chains before finishing with a Forward or Back Aerial. Up Tilt also offers another killing option, although being later than most of his other attacks, with the Sweetspot can kill before 140% against middleweights, lightweights, and the lighter heavyweights. It also combos out of SHFF Up Airs and Neutral Airs, so that’s another thing that you can take note of.
Like Forward Tilt, Up Tilt has a few options which limit its usefulness in the long run. Hitting with the Sourspot of the attack makes it absurdly unsafe on shield, while the attack already isn’t that safe as is. It has the slowest FAF frame of all of his grounded standard attacks excluding Dash Attack, and has some problems linking properly at higher percents. It begins to lose its usefulness around the 70-90% range where it doesn’t have enough knockback to kill and has no follow-ups at all, even airdodge reads become impossible due to it launching too far. It also has extremely pitiful range from the front, making it almost impossible for opponents even within point-blank distance of Roy to get hit by the sourspot, while you must turn around to hit opponents with a wider-ranged arc to the attack. While not the best of his moves, it has a wide variety of downsides and upsides which will make you decide whether or not to use this in your moveset or not.
Down Tilt
Down Tilt is one of Roy’s best moves in his entire moveset, based entirely around one aspect: its speed. While most attacks that are similar to it are either slow or do low damage, Roy’s is the very opposite: It comes out two frames slower than his Jab, at Frame 7, but has one frame earlier of a FAF frame, at frame 22. It deals 11% with the sweetspot as well as a decent amount of hitstun and the tip deals 6.5%. While these numbers seem incoherent at first glance, take this into account: Down Tilt is one of Roy’s only extremely safe on shield attack due to it giving amazing shield pressure, especially when hitting the Sweetspot of the hit, and the tip causes a tiny amount of knockback, enough for anyone who drops shield and approaches to be spaced out anyways.
Down Tilt’s main application is similar to that of his Forward Tilt but in a different regard. It is one of his several get-the-****-off-me tools, and works especially well as it can link into other attacks such as a Dash Attack if your opponent reacts badly, giving you tons of space to either approach, choose a different option, or prepare for another approach by the opponent. Opponents cannot just run in and shield a Down Tilt like they would a Forward Tilt or Jab from most other characters, and instead will be eating several Down Tilts on their shield if they are not careful. Down Tilt also has an interesting function as an edgeguarder against opponents who recover low but can’t snap onto ledge, such as Ike, Kirby, Little Mac, and Cloud, due to it having moderate range and the tip dealing enough knockback to push them away a bit. Attempting to hold crouch for a Down Tilt also can leave opponents thinking you are preparing to counter an attack, which can cause a change in their gameplan in order to counter your counter usage. If that makes any sense.
The only real downside to using Down Tilt is that it has absolutely no upwards range, but that is merely just because it is a lower hitting attack (obviously) than the rest of his moveset. Otherwise, this move is a move you should be using constantly whenever you are not approaching opponents with Jabs, Forward Tilts, Neutral Airs, or Forward Airs. If anything, I’d say that most players don’t actually use Down Tilt enough and instead use Forward Smashes for the same purpose. Which, probably doesn’t work, you know.
Dash Attack
Roy’s Dash Attack is identical in animation to Marth’s, except for the fact that Roy takes a slightly larger step forward (Don’t count me on that one, it’s how it feels there) before slashing and it has less range. However, unlike Marth’s, which is rather difficult to hit the tipper on due to there being a delay between the input and the slash as well as it being a moving attack, Roy’s benefits greatly by said circumstances due to it NEEDING you to get close in order to do any worthwhile damage to your opponents. However, despite this, it still is held back by several factors that all are mostly the fault of the type of attack it is.
Dash Attack is actually pretty powerful (although not to the extent of some characters’ standard attacks), killing around 130% against good DI around the ledge if not earlier. The Sourspot of the attack does abnormally high knockback for a sourspot hit for Roy, but still is extremely pitiful in terms of damage and overall knockback. It stuffs out roll spammers, especially characters with slow rolls such as Samus and Bayonetta, and does moderate shield damage. It works especially well when combatting characters with very good rolls such as Little Mac and Duck Hunt with players who love rolling away or towards you, as you can do a short extended foxtrot (Letting the initial dash distance go, inputting another forwards dash then immediately doing a backwards dash, and repeating this) in order to hit roll ins. Dash Attack also happens to work well as a tech punish on backrolls, in-place getups, and against some attack getups.
However, Roy’s Dash Attack has far too many flaws to override the good things of damage and punishing rolls. It is Roy’s slowest standing attack excluding his Forward Smash, which has better damage, kill power, and a middlespot that still does moderate damage despite being a bit far out of his blade. Of all of his non-Smash Attacks, it has the longest FAF frame of his standing moves excluding his Counter and all three final hits of Dancing Blade (although the upwards variant has 1 more frame of endlag), making it hard to avoid getting punished. It is incredibly unsafe on shield due to that very reason, with little shieldstun at the tip and barely enough stun at the sweetspot to possibly avoid a follow-up if they screw up any attack once, excluding Sheik because, well, Sheik is just a friggin arse. ‘Nuff said. And despite being a powerful attack, it STILL has issues killing due to an only moderate knockback growth and a poor launching angle for killing at midstage.
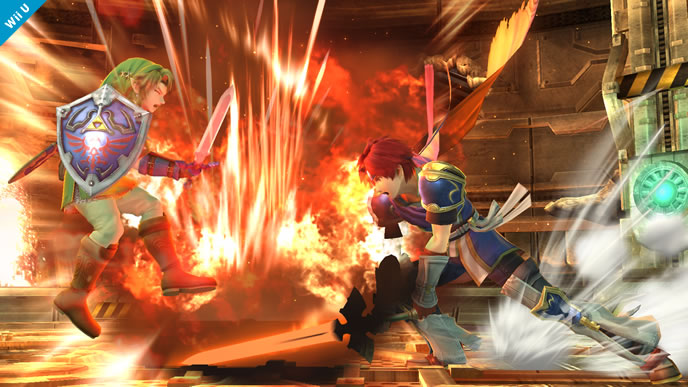
Forward Smash i.e. Nuclear Smash of For Glory Players
![]()
Roy’s Forward Smash is very well known for being absurdly powerful, to the point of practically being absurd at the closest hitbox. Unlike most of Roy/Marth’s moves, Roy’s Forward Smash has three different hitboxes depending on the closeness to the sword unlike the normal two different hitboxes: A sweetspot at the closest point to Roy doing a maximum of 28% and a minimum of 20%, a middlespot within, well, the middle of the blade, doing a maximum of 23% and a minimum of 17%, and the sourspot at the tip of the sword with a maximum of 16% and a minimum of 12%. The first active frame of this attack is Frame 14, and has a FAF of 55 frames, in other words nearly a second.
Roy’s Forward Smash is the entire definition of massive-risk, heavy reward. If you hit with the base or even the middlespot of the attack, you WILL be sending your opponent reeling away with 20% or higher damage. With a fully charged closest to the hilt hit, your opponent can die absurdly early, around 30% at the ledge if they aren’t careful. On the other hand, if you hit with the tip or hit with the middle or tip of the attack on a shielding opponent, it is a free punish for anyone since the tip has little hitstun, no shieldstun, and does practically nothing in terms of damage and knockback against characters. I’m almost one hundred percent certain that Bowser’s natural armor against weak attacks can take a tip Forward Smash. not really but you get what I mean.
Everyone in For Glory seems to believe that this attack is the absolute best move in the entire game and spams it almost as much as the lenny face and ‘kek’ crap go around these days. Please, don’t spam any of those three. Roy’s Forward Smash is meant to be used on a hard read or to keep opponents away, and isn’t a good tool in the neutral since your opponent basically has two thirds of a second to react to what you are doing and punish you. And characters with Counters literally sit there and counter it before watching you die at 0%. Specifically YOU, Corrin. Just, don’t use this in neutral and use it for punishes and you will be good.
Up Smash
![]()
(What even)
Roy’s Up Smash, also known as the Thundercat due to a very certain cartoon which should be pretty obvious by the move’s title, is one of my personal favorite moves in his entire moveset despite it being rather quirky for a move of its type. It is multi-hit, but not in the regard of a character’s such as Meta Knight or Link’s. The first hit deals 1% and is a linker in the rest of the hits, with three middle hits causing 2% uncharged and then the final hit dealing 10% uncharged. At full charge, the first hit goes to 1.4%, the middle hits become around 2.8%, and the final hit deals 14%. The first hit hits at frame 12, and the final hit with all of the knockback comes at frame 22 and lasts for two frames.
It’s primary use (although the attack can be used to however you wish) is an anti-air punish tool or a move to use if you think opponents will roll in but you aren’t sure if they will cross you up or not. It has decent range with the initial hit catching opponents on either side of you and pops opponents straight upwards for follow-ups if you are good at reading airdodges. It’s also pretty powerful even uncharged, and kills at a not bad percent for how nice it is. It also, if you hit with the tip of the attack, the attack’s animation will come out and all of the initial and middle hits will connect obscenely faster than normal, which is probably just a bug but also makes the FAF frame be faster due to there being no hitstun between each of the hits. Again, that’s probably just a glitch, but it makes stuffing aerial approaches and killing quite faster when under a time crunch.
The main problems with this attack are that it is incredibly unsafe on a shielding opponent due to the later hits not connecting at all, leaving you wide open for any punish an opponent wants to use, and that it isn’t as reliable of a killing option as many other moves which are either faster, safer, or more powerful. However, Up Smash still is a good balance of all of this and shouldn’t be overlooked just because it looks like an idiot stabbing upwards then a Harry Potter spell comes out of the tip to cause an explosion.
…I’m impressed I typed that down without laughing.
Down Smash
Roy’s Down Smash is basically identical to Marth’s, except after Patch 1.1.4 is now laggier than it, in all regards. It is a forwards grounded slash followed by a backwards grounded slash, with the second hit launching at a more horizontal angle and carrying much more knockback and damage but being harder to hit than the initial swing. The front swing deals 15% sweetspotted uncharged and 10% sourspotted uncharged, with the back swing causing 17% sweetspot uncharged and 11% sourspot uncharged. The earliest it comes out is Frame 6 on the front swing, only 1 frame slower than his Jab and the same first active frame of Roy’s Up Tilt. The back swing hits on Frame 21.
Down Smash’s only real purpose, due to it being a bit lacking in terms of having an awful FAF frame of 63, is the fact it can catch rolls on both sides of you a bit better than your Up Smash can. This is solely due to the fact both swings have more range than the initial hit of Up Smash, and also gives you a bit of leniency for timing your Down Smash. The backswing also holds almost all of the launching potential and does the most damage, meaning that if they roll in expecting a Forward Smash and get hit with the back swing, it’s more akin to Forward Smash damage and knockback, funnily enough.
Problems for Down Smash? That FAF frame. It is the slowest of all of Roy’s attacks barring a fully charged Flare Blade (Or partially charged to a point) and the final downwards angled hit of Double-Edged Dance. The front swing has less damage than the back and launches them slightly upwards, and while opponents being above you sounds awesome by the time you are able to act out of a Down Smash, your opponent probably will have already fastfalled to the ground and either grabbed you or hit you with a Neutral Air. The sourspot also hurts a lot since it does little damage and knockback and leaves you wide open. Don’t use this in the neutral except for against roll in-happy opponents.
Roy’s Jab is one of the more interesting ones for me to look at, as unlike the rest of the cast it holds its uses not in spacing out the opponent, but instead fits the role of a very useful combo starter that comes out very quickly. Coming out as early as Frame 5 and a FAF frame (First Actionable Frame, in other words how fast you can do anything else out of an attack) of 23, it is probably the single most useful Jab in the game based on the character it is, while I personally think Little Mac’s Jab is the best in the game, but the character already has enough good grounded moves that Jab kinda gets overshadowed.
Its main use comes in the fact it can link directly into a Down Smash, Forward Smash, Up Tilt, Forward Tilt, Down Tilt, Double-Edged Dance, Blazer, or uncharged Flare Blade. In other words, pretty much his entire moveset. It lets you quickly rack up damage with Jab-Up Tilt-Up Tilt-Up Air for a free damage combo that from testing is rather hard to escape from, since if you airdodge you get caught by another Up Tilt and jumping away can get caught by an Up Air. Jab also provides Roy with his fastest OOS option, barely 1 frame faster than the earliest hitboxes of Down Smash and Up Tilt, and provides much more utility than those two can for putting on pressure yourself, which is the entirety of how Roy can even function as a character. It also can pressure shielding opponents into anticipating a reaction and doing something else, as remaining in shield can result in multiple Jabs and Down Tilts or a grab, which can convert into heavy damage if reads are involved.
If you don’t want to simply do damage at a low to high percent, just dash forwards and grab them. This lets you use Down Throw for kills, Forward Throw to chuck opponents offstage if they do a ledge getup, or Up Throw for killing. It will work even at absurdly high percents against some characters, specifically fastfallers and characters with large hitboxes, and the Grab will usually connect to the point where pummeling three or so times then Up Throwing will kill. For example, Fox still gets grabbed past 200% despite dying to Up Throw around 160%.
It does have its downsides, though. Sadly. Unlike other Jabs such as Mario’s, Cloud’s, and even Duck Hunt’s, this Jab barely puts any distance between you and your opponent. While this might not seem all that bad, it makes escaping from a disadvantageous state extremely difficult without reading a bad reaction from the opponent due to it not keeping them away. Jab doesn’t help Roy’s main problem with projectile campers since it does nothing to assist in keeping them from doing anything, and at higher percents (around 100-110%) follow-ups start to disappear due to the knockback on the attack.
Overall Roy’s Jab is probably his best move to just throw out in the neutral, and can be extremely useful on hit and isn’t that bad on block. I’d say that it’s probably Roy’s most useful tool in his entire arsenal, but don’t quote me on that – I’m just a poor Little Mac main!
Forward Tilt
The poor forgotten Forward Tilt lies here within Roy’s moveset, and despite the fact on paper it looks really good (and has managed to make me get the Sandbag to go past 10000 ft. in the Home-Run Contest, lol), it in reality is just a sub-par move. It is quite fast, coming out on Frame 8, lasting for three frames, then having the earliest actionability frame at Frame 32, just over half a second, it actually has quite good speed for the range and damage that it can deal. The sourspot of the attack deals 9% while the sweetspot deals 12%, has a ton of hitstun for absolutely no reason whatsoever, and has increased knockback. It actually does reliably kill opponents around the 150% range at maximum for the heavyweights and 130% for the upper Middleweights. While not as strong as, say, the explosive power of a fully charged Flare Blade or his Forward Smash, Forward Tilt is a more consistent killing option since you don’t have to get a read or break a shield to hit one of them.
Outside of Down Tilt and occasionally Jab as well as Neutral Air, Forward Tilt is Roy’s best get-the-frick-off-me tool in his entire moveset, covering a wide arc in front of him. While not the length of Marth’s, Roy’s has less range in return for more reliability at stuffing rushdown characters and overall working more effectively towards what it was meant to do. Marth’s entire moveset was designed specifically for the purpose of keeping opponents away and getting great spacing; Roy’s was not.
Forward Tilt also combos directly out of Jab at early percents against midweight and heavyweight opponents as well as fastfallers, although the latter two can DI down at early percents and shield the Forward Tilt then punish as they please. It stops working around the 30-40% range for most characters, especially if they DI away. Forward Tilt also can stuff ledge getups past 100%, as many of them will be slow enough for you to react, shield, then Forward Tilt for an easy kill.
Problems begin to arise quickly once you start looking at its flaws. While Forward Tilt is fast, it isn’t anywhere close to the speed of Roy’s Down Tilt or Jab, which are superior spacing tools and have more utility after hit than Forward Tilt. While its FAF frame does give you a bit of leeway when missing, faster characters such as Sheik and Captain Falcon can just run up to you and dashgrab right after a whiffed or blocked Forward Tilt, as even the added hitstun from the Sweetspot won’t save you when you can’t even get off the damage and STILL get punished for it. Overall, Forward Tilt is an average move with moderate usage, and can be used in the neutral to stuff out approaching characters while still being powerful and fast, without the cost of staling any of your more powerful killing options such as Smashes.
Up Tilt
Roy’s Up Tilt is actually similar in vein to his Forward Tilt, but with many more applicable moments for it to shine. Coming out at its maximum earliest at frame 6 from the front and ending several frames later from behind, Up Tilt covers every single area of Roy’s body and is, of course, a disjoint, functioning like Cloud’s Up Tilt for everyone who is reading this (We ALL know everyone has a Pocket Cloud. Who doesn’t!?) except for the fact it has more range. At early percents, this attack can link into itself (although at 0% your opponent most likely will be able to DI down and shield after the first) as well as later percents connecting into Up Air strings, a Forward Air, Neutral Air, or Back Air.
Up Tilt has a rather wide variety of uses, especially during the neutral game due to it covering his entire hitbox. Against rushdown opponents that love aerial approaches such as Fox and Pikachu (excluding against those two if they projectile camp a lot), Up Tilt can stuff them out better than it can grounded approaches but still can do well against grounded ones as well. As a linker, if you read an airdodge on a Down Throw you can initiate Up Tilt and Up Air chains before finishing with a Forward or Back Aerial. Up Tilt also offers another killing option, although being later than most of his other attacks, with the Sweetspot can kill before 140% against middleweights, lightweights, and the lighter heavyweights. It also combos out of SHFF Up Airs and Neutral Airs, so that’s another thing that you can take note of.
Like Forward Tilt, Up Tilt has a few options which limit its usefulness in the long run. Hitting with the Sourspot of the attack makes it absurdly unsafe on shield, while the attack already isn’t that safe as is. It has the slowest FAF frame of all of his grounded standard attacks excluding Dash Attack, and has some problems linking properly at higher percents. It begins to lose its usefulness around the 70-90% range where it doesn’t have enough knockback to kill and has no follow-ups at all, even airdodge reads become impossible due to it launching too far. It also has extremely pitiful range from the front, making it almost impossible for opponents even within point-blank distance of Roy to get hit by the sourspot, while you must turn around to hit opponents with a wider-ranged arc to the attack. While not the best of his moves, it has a wide variety of downsides and upsides which will make you decide whether or not to use this in your moveset or not.
Down Tilt
Down Tilt is one of Roy’s best moves in his entire moveset, based entirely around one aspect: its speed. While most attacks that are similar to it are either slow or do low damage, Roy’s is the very opposite: It comes out two frames slower than his Jab, at Frame 7, but has one frame earlier of a FAF frame, at frame 22. It deals 11% with the sweetspot as well as a decent amount of hitstun and the tip deals 6.5%. While these numbers seem incoherent at first glance, take this into account: Down Tilt is one of Roy’s only extremely safe on shield attack due to it giving amazing shield pressure, especially when hitting the Sweetspot of the hit, and the tip causes a tiny amount of knockback, enough for anyone who drops shield and approaches to be spaced out anyways.
Down Tilt’s main application is similar to that of his Forward Tilt but in a different regard. It is one of his several get-the-****-off-me tools, and works especially well as it can link into other attacks such as a Dash Attack if your opponent reacts badly, giving you tons of space to either approach, choose a different option, or prepare for another approach by the opponent. Opponents cannot just run in and shield a Down Tilt like they would a Forward Tilt or Jab from most other characters, and instead will be eating several Down Tilts on their shield if they are not careful. Down Tilt also has an interesting function as an edgeguarder against opponents who recover low but can’t snap onto ledge, such as Ike, Kirby, Little Mac, and Cloud, due to it having moderate range and the tip dealing enough knockback to push them away a bit. Attempting to hold crouch for a Down Tilt also can leave opponents thinking you are preparing to counter an attack, which can cause a change in their gameplan in order to counter your counter usage. If that makes any sense.
The only real downside to using Down Tilt is that it has absolutely no upwards range, but that is merely just because it is a lower hitting attack (obviously) than the rest of his moveset. Otherwise, this move is a move you should be using constantly whenever you are not approaching opponents with Jabs, Forward Tilts, Neutral Airs, or Forward Airs. If anything, I’d say that most players don’t actually use Down Tilt enough and instead use Forward Smashes for the same purpose. Which, probably doesn’t work, you know.
Dash Attack
Roy’s Dash Attack is identical in animation to Marth’s, except for the fact that Roy takes a slightly larger step forward (Don’t count me on that one, it’s how it feels there) before slashing and it has less range. However, unlike Marth’s, which is rather difficult to hit the tipper on due to there being a delay between the input and the slash as well as it being a moving attack, Roy’s benefits greatly by said circumstances due to it NEEDING you to get close in order to do any worthwhile damage to your opponents. However, despite this, it still is held back by several factors that all are mostly the fault of the type of attack it is.
Dash Attack is actually pretty powerful (although not to the extent of some characters’ standard attacks), killing around 130% against good DI around the ledge if not earlier. The Sourspot of the attack does abnormally high knockback for a sourspot hit for Roy, but still is extremely pitiful in terms of damage and overall knockback. It stuffs out roll spammers, especially characters with slow rolls such as Samus and Bayonetta, and does moderate shield damage. It works especially well when combatting characters with very good rolls such as Little Mac and Duck Hunt with players who love rolling away or towards you, as you can do a short extended foxtrot (Letting the initial dash distance go, inputting another forwards dash then immediately doing a backwards dash, and repeating this) in order to hit roll ins. Dash Attack also happens to work well as a tech punish on backrolls, in-place getups, and against some attack getups.
However, Roy’s Dash Attack has far too many flaws to override the good things of damage and punishing rolls. It is Roy’s slowest standing attack excluding his Forward Smash, which has better damage, kill power, and a middlespot that still does moderate damage despite being a bit far out of his blade. Of all of his non-Smash Attacks, it has the longest FAF frame of his standing moves excluding his Counter and all three final hits of Dancing Blade (although the upwards variant has 1 more frame of endlag), making it hard to avoid getting punished. It is incredibly unsafe on shield due to that very reason, with little shieldstun at the tip and barely enough stun at the sweetspot to possibly avoid a follow-up if they screw up any attack once, excluding Sheik because, well, Sheik is just a friggin arse. ‘Nuff said. And despite being a powerful attack, it STILL has issues killing due to an only moderate knockback growth and a poor launching angle for killing at midstage.
Forward Smash i.e. Nuclear Smash of For Glory Players

Roy’s Forward Smash is very well known for being absurdly powerful, to the point of practically being absurd at the closest hitbox. Unlike most of Roy/Marth’s moves, Roy’s Forward Smash has three different hitboxes depending on the closeness to the sword unlike the normal two different hitboxes: A sweetspot at the closest point to Roy doing a maximum of 28% and a minimum of 20%, a middlespot within, well, the middle of the blade, doing a maximum of 23% and a minimum of 17%, and the sourspot at the tip of the sword with a maximum of 16% and a minimum of 12%. The first active frame of this attack is Frame 14, and has a FAF of 55 frames, in other words nearly a second.
Roy’s Forward Smash is the entire definition of massive-risk, heavy reward. If you hit with the base or even the middlespot of the attack, you WILL be sending your opponent reeling away with 20% or higher damage. With a fully charged closest to the hilt hit, your opponent can die absurdly early, around 30% at the ledge if they aren’t careful. On the other hand, if you hit with the tip or hit with the middle or tip of the attack on a shielding opponent, it is a free punish for anyone since the tip has little hitstun, no shieldstun, and does practically nothing in terms of damage and knockback against characters. I’m almost one hundred percent certain that Bowser’s natural armor against weak attacks can take a tip Forward Smash. not really but you get what I mean.
Everyone in For Glory seems to believe that this attack is the absolute best move in the entire game and spams it almost as much as the lenny face and ‘kek’ crap go around these days. Please, don’t spam any of those three. Roy’s Forward Smash is meant to be used on a hard read or to keep opponents away, and isn’t a good tool in the neutral since your opponent basically has two thirds of a second to react to what you are doing and punish you. And characters with Counters literally sit there and counter it before watching you die at 0%. Specifically YOU, Corrin. Just, don’t use this in neutral and use it for punishes and you will be good.
Up Smash

(What even)
Roy’s Up Smash, also known as the Thundercat due to a very certain cartoon which should be pretty obvious by the move’s title, is one of my personal favorite moves in his entire moveset despite it being rather quirky for a move of its type. It is multi-hit, but not in the regard of a character’s such as Meta Knight or Link’s. The first hit deals 1% and is a linker in the rest of the hits, with three middle hits causing 2% uncharged and then the final hit dealing 10% uncharged. At full charge, the first hit goes to 1.4%, the middle hits become around 2.8%, and the final hit deals 14%. The first hit hits at frame 12, and the final hit with all of the knockback comes at frame 22 and lasts for two frames.
It’s primary use (although the attack can be used to however you wish) is an anti-air punish tool or a move to use if you think opponents will roll in but you aren’t sure if they will cross you up or not. It has decent range with the initial hit catching opponents on either side of you and pops opponents straight upwards for follow-ups if you are good at reading airdodges. It’s also pretty powerful even uncharged, and kills at a not bad percent for how nice it is. It also, if you hit with the tip of the attack, the attack’s animation will come out and all of the initial and middle hits will connect obscenely faster than normal, which is probably just a bug but also makes the FAF frame be faster due to there being no hitstun between each of the hits. Again, that’s probably just a glitch, but it makes stuffing aerial approaches and killing quite faster when under a time crunch.
The main problems with this attack are that it is incredibly unsafe on a shielding opponent due to the later hits not connecting at all, leaving you wide open for any punish an opponent wants to use, and that it isn’t as reliable of a killing option as many other moves which are either faster, safer, or more powerful. However, Up Smash still is a good balance of all of this and shouldn’t be overlooked just because it looks like an idiot stabbing upwards then a Harry Potter spell comes out of the tip to cause an explosion.
…I’m impressed I typed that down without laughing.
Down Smash
Roy’s Down Smash is basically identical to Marth’s, except after Patch 1.1.4 is now laggier than it, in all regards. It is a forwards grounded slash followed by a backwards grounded slash, with the second hit launching at a more horizontal angle and carrying much more knockback and damage but being harder to hit than the initial swing. The front swing deals 15% sweetspotted uncharged and 10% sourspotted uncharged, with the back swing causing 17% sweetspot uncharged and 11% sourspot uncharged. The earliest it comes out is Frame 6 on the front swing, only 1 frame slower than his Jab and the same first active frame of Roy’s Up Tilt. The back swing hits on Frame 21.
Down Smash’s only real purpose, due to it being a bit lacking in terms of having an awful FAF frame of 63, is the fact it can catch rolls on both sides of you a bit better than your Up Smash can. This is solely due to the fact both swings have more range than the initial hit of Up Smash, and also gives you a bit of leniency for timing your Down Smash. The backswing also holds almost all of the launching potential and does the most damage, meaning that if they roll in expecting a Forward Smash and get hit with the back swing, it’s more akin to Forward Smash damage and knockback, funnily enough.
Problems for Down Smash? That FAF frame. It is the slowest of all of Roy’s attacks barring a fully charged Flare Blade (Or partially charged to a point) and the final downwards angled hit of Double-Edged Dance. The front swing has less damage than the back and launches them slightly upwards, and while opponents being above you sounds awesome by the time you are able to act out of a Down Smash, your opponent probably will have already fastfalled to the ground and either grabbed you or hit you with a Neutral Air. The sourspot also hurts a lot since it does little damage and knockback and leaves you wide open. Don’t use this in the neutral except for against roll in-happy opponents.
A Rexacalibur with Infinite Uses: Standard Aerial Attacks
Roy’s aerial attacks are where he begins to truly shine, as each one has a purpose for existing and each can he used in a standard match without having to put a very heavy amount of risk on the line (Barring Down Air, but that’s kinda the purpose of that move.) He uses his aerials commonly either for approaching, retreating, or just to stuff opponents out, especially ones like Fox and Pikachu that can easily get in a grab or a few hits then retreat away in order to prevent them from doing as they please. Hell, I’d say a Roy player could most likely win by using ONLY his aerials because of how good they are. All of them have been buffed to have reduced landing lag, and due to his fast faller nature he can easily use SHFF (read Neutral Air for that) Neutral Airs, Forward Airs, Back Airs, and Up Airs all he wants and opponents will be hard-pressed to find a free opportunity if you hit them with the sweetspot of the attack on their shield. Unless they are Sheik. ‘Cuz eff Sheik.
The only problem with his aerials is, well, the fact they ARE aerials – they put yourself directly above your opponent and in the line of fire for every single up smash in the entire game and can get juggled easily due to your fast falling speed and his aerials short range and requirement to be within point-blank distance in order to do the necessary damage. They are moderate-risk, high-reward attacks that often do enough damage to offset the fact you have to commit to doing it when going in.
Neutral Air
![]()
Roy’s neutral air is one of his most safe attacks in his entire moveset, and is one of the few that is great to use in the neutral. It has two hitboxes, the first coming out at frame 6 and the second at frame 15, with the second hit lasting for six frames and the first ending after two. The tipper of the attack does pitiful damage and knockback, 9% if you hit both sourspots and even connect the second, while both sweetspotted hits cause 14.5%. While not a kill move due to its angle, base damage, and low base knockback, it covers Roy’s entire body and with a low amount of landing lag at 11 frames, you can do Short Hop Fast Fall Neutral Airs (Or SHFF NAirs, for short) and space out opponents when retreating or approaching.
Neutral Air’s best usage is, well, approaching and retreating away from opponents while keeping an active hitbox up. Since it covers the entirety of Roy’s body as well as behind him with the first hit, it can also catch backrolls, spotdodges due to the lasting hitbox, and can work even if you forget to turn around before short hopping and inputting out a Neutral Air. Certain characters have a massive amount of trouble getting around the Neutral Air outside of Shield Grabs, in particular Ganondorf, Bowser, Donkey Kong, and King Dedede, although the lattermost character has only slight issues due to having disjoints of his own. Larger opponents are at a heavier disadvantage compared to smaller ones due to being hit by the strong hitbox easier.
Neutral Air’s only problem is that it cannot autocancel in a short hop or even in a full hop unless perfectly times for a Full Hop, due to a full hop being 48 frames and the Autocancel window being at 47. It also cannot kill, although Roy has so many moves that already can kill before 150% that having Neutral Air, which already is a very good move, killing would make it a bit too good, at least for my opinions. It also has some minor issues getting past shields, but if you begin noticing opponents shield when you approach simply do empty hops and grab them out of the shield (Or land a bit away or behind them for a punish.) Similarly to Roy’s Down Tilt and Jab, there isn’t much of a downside for using this whenever possible, so have fun using this to your absolute heart’s content.
Forward Air
Roy’s Forward Air is remarkably similar to Marth’s, in damage and animation as well as landing lag, but they both serve entirely different purposes. Marth’s serves as a prime spacer and, as of a recent patch which buffed the sourspot and sweetspot damages slightly, now is a great offstage gimp kill tool in addition to his Back Air. On the other hand, Roy’s, coming out frame 10 and dealing 11 damage at the sweetspot and 7 damage at the sourspot, is not a kill move but instead a follow-up tool after a Down Throw for reads or a semi-safe approaching tool. It autocancels in a full hop but has manageable landing lag when used close to the ground.
Forward Air is great as an approaching option and one of the safer moves to use in a Short Hop (despite its 13 frames of landing lag) as it can force opponents back offstage, which is the very position many Roy players will enjoy having their opponents into: pressured into a corner (i.e. offstage) where they might make a mistake. Some characters such as Little Mac, Ganondorf, and Captain Falcon hate being in this specific scenario as one Neutral, Forward, or Back Air hitting them may result in an immediate stock loss due to how predictable their recoveries are. Hitting them once can give a free punish towards players who are fast enough to get off a down air or can get a ledge trump, or are prepared to do a stage spike and risk losing a stock themselves.
In a similar vein to many of his other attacks that are often good to use in the neutral, Roy’s Forward Air has little downsides but still has some that might heavily deter you from using it commonly. While it does good damage, the tip is unsafe even on hit, and can be punished easily by any character with a decent ranging hit that comes out relatively fast. This includes Sheik because… Reasons. The sweetspot also is not safe on a shielding opponent, making shieldgrabs extremely easy to execute against Roys who think it’s safe to use whenever. It cannot Autocancel in a short hop, and even with its very tiny amount of landing lag it can be punished by fast characters such as Sheik, Captain Falcon, the Pits, and anything that can move faster than a speeding Ganondorf can basically just run up and grab you for free and get a punish afterwards. I find myself relying on this move occasionally for the burst of damage it gives out over Neutral Air’s harder hit that requires two hits, as well as Forward Air being capable of killing around 140% or lower at the edge against much of the viable cast (I mean by that Bowser, Dedede, and DK probably can survive at that percent, but you won’t see many of those characters anyways.)
Back Air
Roy’s back air is effectively the same as his Forward Air, but with a few key differences. It deals 9% damage at the tip and a very good 12% at the base, but the tip has very disproportionate knockback while the base has as much as you would expect from the strong hit of a back aerial. It comes out 2 frames earlier, at frame 8, and ends 2 frames ealier but has the same hitbox duration, ending at frame 10. Back Air also has less base knockback but quite a bit more knockback growth, and as such will kill earlier at later percents at center stage. Its FAF, however, is a major difference between the two: Back Air is at Frame 36, Forward Air at 30. It also has three more landing lag frames than Forward Air, at 16.
Back Air is an exceptional edgeguard tool, and can be a kill option against some of the lighter characters in the cast such as Sheik, Fox, and Zero Suit Samus, especially around the edge against ledge jump getup users and bad or predictable recoveries such as Cloud, Mario if you time it right, and Roy himself. It also turns Roy around, so as long as you keep switching the direction that you attack you will always be using Back Air. So, if you do a Back Air, inputting another ‘Back Air’ will result in a Forward Air coming out, as Back Air will switch Roy’s direction around. This also can potentially help if you are fighting against a Shulk who is using Back Slash, but then again if you are fighting a Shulk in the firs tplace most likely you are on For Glory.
Back Air’s main problem is that while it is faster and stronger than Forward Air, you have a lot of commitment to do so. It has more landing lag frames and 6 frames later of a FAF frame, which makes landing directly in front of an opponent who is shielding with a Back Air one of the most unsafe things you can do as a Roy, especially against characters with very good grabs. Otherwise, it practically is a stronger, faster Forward Air. So, if you have the time to be able to input SHFF Back Airs, then have fun doing so. I can’t really stop you.
Up Air
![]()
Roy’s Up Air, contrary to practically every single Up Air on all other characters in the game to my memory barring like Jigglypuff (who kinda isn’t that good anyways) it is NOT a killing move. I’m not entirely sure why this is, but Up Air actually isn’t as good as you might think that it is. The Sweetspot of the attack causes 9% but the sour deals only 6%. Coming out at Frame 5, it is one of Roy’s longest lasting attacks outside of his Neutral Air, lasting until Frame 12. It also has a FAF frame of 42, Autocancels at past 38 frames or when inputted and landing within two frames of starting the attack for some reason.It also has 14 frames of landing lag.
Up Air’s main use is for comboing out of Down Throw at very late percents after an airdodge read or being used to follow up itself and to catch aerial approaches. You can also use it after an Up Tilt chain if you are feeling ballsy, but usually opponents can jump away or airdodge to avoid the Up Air follow-up. It deals little knockback, and keeps opponents usually within range of another Up Air, and around 90-100% against heavier characters you may have to jump in order to catch them with another Up Air.
You can also use Up Air as an approaching tool by doing SHFF Up Airs, since they cover such a wide are above Roy’s body. However, while this does have a disjointed hitbox above Roy, his Neutral Air is most of the time a better option than Up Air, although Up Air does have follow-up capabilities.
Up Air has very few problems, all of which are very understandable. It hits ONLY above Roy, which is problematic against shorter characters if you approach with it. With low knockback, it is one of a very select few of Roy’s moves that AREN’T killing options (Kills past 180% on Toon Link as a base), even with the sweetspot on the attack, despite having a massive range that can’t be truly abused that much. While it is difficult to say it is or isn’t ‘safe on shield’ due to you probably not using it near grounded opponents, its 14 frames of Landing Lag are just enough to get punished for landing next to an opponent.
Down Air
Roy’s Down Air is similar, hell, almost identical to Ike’s, except it sweetspots with the base of the blade with the sweetspot. The tipper of the blade causes very little knockback and damage and overall just sucks, but then again so does most of Roy’s unsweetspotted attacks. The base of the blade deals a hefty 15% while the tip does 10%. It also happens to be one of Roy’s slowest attacks, coming out Frame 16, having a FAF frame of 52, being the latest FAF frame for any of Roy’s standard attacks excluding Smash Attacks, Autocancels past Frame 55, and has a high 23 frames of landing lag.
It’s best application is, of course, meteoring recovering opponents. As with all Down Airs, when connected at a certain part – in this case, the base of the blade – opponents will be launched VERY quickly into the shadow realm. With Roy’s Down Air now not being a copy of Marth’s, it is significantly better for this job and is extremely powerful, maybe the second or third most so. It can kill from center stage on grounded opponents quite a bit late, but offers yet another killing option for those interested.
Down Air, however, is Roy’s worst aerial for several reasons. First off, you have to hit with the base of the attack for it to be useful at all, which is pretty frustrating as you can’t be far away and out of reach of Up Airs from opponents before meteoring them. It also is extremely slow, and insanely punishable on shield due to its very long landing lag and FAF frame either way.

Roy’s neutral air is one of his most safe attacks in his entire moveset, and is one of the few that is great to use in the neutral. It has two hitboxes, the first coming out at frame 6 and the second at frame 15, with the second hit lasting for six frames and the first ending after two. The tipper of the attack does pitiful damage and knockback, 9% if you hit both sourspots and even connect the second, while both sweetspotted hits cause 14.5%. While not a kill move due to its angle, base damage, and low base knockback, it covers Roy’s entire body and with a low amount of landing lag at 11 frames, you can do Short Hop Fast Fall Neutral Airs (Or SHFF NAirs, for short) and space out opponents when retreating or approaching.
Neutral Air’s best usage is, well, approaching and retreating away from opponents while keeping an active hitbox up. Since it covers the entirety of Roy’s body as well as behind him with the first hit, it can also catch backrolls, spotdodges due to the lasting hitbox, and can work even if you forget to turn around before short hopping and inputting out a Neutral Air. Certain characters have a massive amount of trouble getting around the Neutral Air outside of Shield Grabs, in particular Ganondorf, Bowser, Donkey Kong, and King Dedede, although the lattermost character has only slight issues due to having disjoints of his own. Larger opponents are at a heavier disadvantage compared to smaller ones due to being hit by the strong hitbox easier.
Neutral Air’s only problem is that it cannot autocancel in a short hop or even in a full hop unless perfectly times for a Full Hop, due to a full hop being 48 frames and the Autocancel window being at 47. It also cannot kill, although Roy has so many moves that already can kill before 150% that having Neutral Air, which already is a very good move, killing would make it a bit too good, at least for my opinions. It also has some minor issues getting past shields, but if you begin noticing opponents shield when you approach simply do empty hops and grab them out of the shield (Or land a bit away or behind them for a punish.) Similarly to Roy’s Down Tilt and Jab, there isn’t much of a downside for using this whenever possible, so have fun using this to your absolute heart’s content.
Forward Air
Roy’s Forward Air is remarkably similar to Marth’s, in damage and animation as well as landing lag, but they both serve entirely different purposes. Marth’s serves as a prime spacer and, as of a recent patch which buffed the sourspot and sweetspot damages slightly, now is a great offstage gimp kill tool in addition to his Back Air. On the other hand, Roy’s, coming out frame 10 and dealing 11 damage at the sweetspot and 7 damage at the sourspot, is not a kill move but instead a follow-up tool after a Down Throw for reads or a semi-safe approaching tool. It autocancels in a full hop but has manageable landing lag when used close to the ground.
Forward Air is great as an approaching option and one of the safer moves to use in a Short Hop (despite its 13 frames of landing lag) as it can force opponents back offstage, which is the very position many Roy players will enjoy having their opponents into: pressured into a corner (i.e. offstage) where they might make a mistake. Some characters such as Little Mac, Ganondorf, and Captain Falcon hate being in this specific scenario as one Neutral, Forward, or Back Air hitting them may result in an immediate stock loss due to how predictable their recoveries are. Hitting them once can give a free punish towards players who are fast enough to get off a down air or can get a ledge trump, or are prepared to do a stage spike and risk losing a stock themselves.
In a similar vein to many of his other attacks that are often good to use in the neutral, Roy’s Forward Air has little downsides but still has some that might heavily deter you from using it commonly. While it does good damage, the tip is unsafe even on hit, and can be punished easily by any character with a decent ranging hit that comes out relatively fast. This includes Sheik because… Reasons. The sweetspot also is not safe on a shielding opponent, making shieldgrabs extremely easy to execute against Roys who think it’s safe to use whenever. It cannot Autocancel in a short hop, and even with its very tiny amount of landing lag it can be punished by fast characters such as Sheik, Captain Falcon, the Pits, and anything that can move faster than a speeding Ganondorf can basically just run up and grab you for free and get a punish afterwards. I find myself relying on this move occasionally for the burst of damage it gives out over Neutral Air’s harder hit that requires two hits, as well as Forward Air being capable of killing around 140% or lower at the edge against much of the viable cast (I mean by that Bowser, Dedede, and DK probably can survive at that percent, but you won’t see many of those characters anyways.)
Back Air
Roy’s back air is effectively the same as his Forward Air, but with a few key differences. It deals 9% damage at the tip and a very good 12% at the base, but the tip has very disproportionate knockback while the base has as much as you would expect from the strong hit of a back aerial. It comes out 2 frames earlier, at frame 8, and ends 2 frames ealier but has the same hitbox duration, ending at frame 10. Back Air also has less base knockback but quite a bit more knockback growth, and as such will kill earlier at later percents at center stage. Its FAF, however, is a major difference between the two: Back Air is at Frame 36, Forward Air at 30. It also has three more landing lag frames than Forward Air, at 16.
Back Air is an exceptional edgeguard tool, and can be a kill option against some of the lighter characters in the cast such as Sheik, Fox, and Zero Suit Samus, especially around the edge against ledge jump getup users and bad or predictable recoveries such as Cloud, Mario if you time it right, and Roy himself. It also turns Roy around, so as long as you keep switching the direction that you attack you will always be using Back Air. So, if you do a Back Air, inputting another ‘Back Air’ will result in a Forward Air coming out, as Back Air will switch Roy’s direction around. This also can potentially help if you are fighting against a Shulk who is using Back Slash, but then again if you are fighting a Shulk in the firs tplace most likely you are on For Glory.
Back Air’s main problem is that while it is faster and stronger than Forward Air, you have a lot of commitment to do so. It has more landing lag frames and 6 frames later of a FAF frame, which makes landing directly in front of an opponent who is shielding with a Back Air one of the most unsafe things you can do as a Roy, especially against characters with very good grabs. Otherwise, it practically is a stronger, faster Forward Air. So, if you have the time to be able to input SHFF Back Airs, then have fun doing so. I can’t really stop you.
Up Air

Roy’s Up Air, contrary to practically every single Up Air on all other characters in the game to my memory barring like Jigglypuff (who kinda isn’t that good anyways) it is NOT a killing move. I’m not entirely sure why this is, but Up Air actually isn’t as good as you might think that it is. The Sweetspot of the attack causes 9% but the sour deals only 6%. Coming out at Frame 5, it is one of Roy’s longest lasting attacks outside of his Neutral Air, lasting until Frame 12. It also has a FAF frame of 42, Autocancels at past 38 frames or when inputted and landing within two frames of starting the attack for some reason.It also has 14 frames of landing lag.
Up Air’s main use is for comboing out of Down Throw at very late percents after an airdodge read or being used to follow up itself and to catch aerial approaches. You can also use it after an Up Tilt chain if you are feeling ballsy, but usually opponents can jump away or airdodge to avoid the Up Air follow-up. It deals little knockback, and keeps opponents usually within range of another Up Air, and around 90-100% against heavier characters you may have to jump in order to catch them with another Up Air.
You can also use Up Air as an approaching tool by doing SHFF Up Airs, since they cover such a wide are above Roy’s body. However, while this does have a disjointed hitbox above Roy, his Neutral Air is most of the time a better option than Up Air, although Up Air does have follow-up capabilities.
Up Air has very few problems, all of which are very understandable. It hits ONLY above Roy, which is problematic against shorter characters if you approach with it. With low knockback, it is one of a very select few of Roy’s moves that AREN’T killing options (Kills past 180% on Toon Link as a base), even with the sweetspot on the attack, despite having a massive range that can’t be truly abused that much. While it is difficult to say it is or isn’t ‘safe on shield’ due to you probably not using it near grounded opponents, its 14 frames of Landing Lag are just enough to get punished for landing next to an opponent.
Down Air
Roy’s Down Air is similar, hell, almost identical to Ike’s, except it sweetspots with the base of the blade with the sweetspot. The tipper of the blade causes very little knockback and damage and overall just sucks, but then again so does most of Roy’s unsweetspotted attacks. The base of the blade deals a hefty 15% while the tip does 10%. It also happens to be one of Roy’s slowest attacks, coming out Frame 16, having a FAF frame of 52, being the latest FAF frame for any of Roy’s standard attacks excluding Smash Attacks, Autocancels past Frame 55, and has a high 23 frames of landing lag.
It’s best application is, of course, meteoring recovering opponents. As with all Down Airs, when connected at a certain part – in this case, the base of the blade – opponents will be launched VERY quickly into the shadow realm. With Roy’s Down Air now not being a copy of Marth’s, it is significantly better for this job and is extremely powerful, maybe the second or third most so. It can kill from center stage on grounded opponents quite a bit late, but offers yet another killing option for those interested.
Down Air, however, is Roy’s worst aerial for several reasons. First off, you have to hit with the base of the attack for it to be useful at all, which is pretty frustrating as you can’t be far away and out of reach of Up Airs from opponents before meteoring them. It also is extremely slow, and insanely punishable on shield due to its very long landing lag and FAF frame either way.
No Clue How To Title This: Roy’s Grab, Pummel, and Throws
(There was no good Roy grab GIFs and I wasn't in the mood to do another.)
Roy’s grab, despite only being a subpar grab with below-average throws, is one of his most useful tools, considering the fact his standard attacks have massive shield problems when hitting any of them. It is a basic forwards lunge with below-average range, and all of his throws involve him either throwing his opponents in a direction or him kicking them away. They aren't bad, nor is Roy's grab all that bad or his pummel, but the fact that they could be significantly better means that there was a problem with designing them.
They do have one massive use, though, and, as stated above, is that they can grab through shields - this means that all that unsafeness is taken away and replaced with you being put into an instantaneous advantage state by using a throw. Just, don't whiff these, OK?
Grab Range
![]()
Roy’s grab range is average at best, especially compared to other characters who look like they would have noticeably less grab range yet have equal or better range than Roy’s. It’s fast, and has only 2 frames more for a FAF frame on all variations of his Grab compared to Sheik (By comparison, just using Sheik as an example as she’s the best character in the roster.)
The main problem with his grab does not lie in its range, however, it’s that his dash grab has… Some hitting issues. While it will always connect at point blank range and won’t whiff in that regard, unlike a character such as Pac-Man with a rather horrible grab, it has even less range than his regular standing grab and can whiff entirely if your opponent moves forwards opposite of you. His normal grab and pivot grab are alright and can be used constantly to get opponents who love shielding out of their little bubble, but avoid dash grabbing if possible unless your opponent plays extremely defensively. Probably just me and my superstitions and not a true fact, however.
Pummel
Roy’s pummel is decently fast, not to the extent of some characters such as Lucario, but deals a sizable more percent than Lucario’s, at 2% per hit. While most characters will usually only get off one pummel before throwing, once opponents reach around 40-60% pummel them three or more times to get extra damage, as most of your throws don’t do much damage anyways and you can make up for it by pummeling them repeatedly for bonus damage. This also can help you kill with Up Throw earlier once opponents hit around 130-140% if they haven’t died by that point.
Forward Throw
Roy’s Forward Throw launches opponents forwards in front of you for follow-ups, which is extremely nice considering many of Roy’s attacks are great at reading options that opponents do. If they miss a tech at low percents, Double-Edged Dance and Dash Attack have you covered. If they tech, pivoted Forward Tilts and waiting a bit before Dash Attacking work. If they jump, any aerial covers almost all of the approaching options that opponents can do after it.
Back Throw
Back Throw is really weird; it at first glance looks extremely good, launching opponents just barely behind you and above you for a follow up in an attack such as an Up Air or Back Air. But in reality, it has too much lag after the throw to be of any use, with nearly a second of waiting before you can do anything, removing the possibility of any follow-ups. It doesn’t kill well at all, killing a level 9 King Dedede in training past 500% and has a bad angle for killing anyways, making it overall a really bad throw to use. It doesn’t even do the most damage of his throws (that title goes to Up Throw), making even THAT not a reasonable choice to use this awful garbage of a move.
Up Throw
Roy’s Up Throw is his only killing throw baring Forward Throw at obscenely high percents, launching opponents upwards and slightly behind him. It kills around 160% for a majority of the commonly-seen cast, and can reach around 180% against ultraheavyweights such as Dedede and Bowser with great DI. Combined with multiple pummels, Up Throw is a very good killing option that doesn’t require you to hit an unshielding opponent.
Down Throw
![]()
Down Throw is, by far, Roy’s best throw, being his main linker into other attacks such as Blazer as a combo at early percents, puts opponents directly in front of you for an easy follow-up, and has much more applications in Roy’s gameplay than all of his other throws (Barring the occasionally useful Up Throw as a kill move). The best thing about it is the fact that it puts opponents directly where you want them; right in the air next to Roy. This allows you to do a mindgame with your opponent; You can either Blazer for gaurenteed damage and they can possibly airdodge through it, or you can read an airdodge and charge a Forward Smash for when they land.
As a note, Down Throw into Up Air and other aerials aren't gaurenteed, but they are extremely good for catching opponents who airdodge. When doing Down Throw Blazer, you should also note that this WILL stale the move and make it weaker for damage and killing, which is probably something you won't want since you can escape from Down Throw Blazer at some percents.

Roy’s grab range is average at best, especially compared to other characters who look like they would have noticeably less grab range yet have equal or better range than Roy’s. It’s fast, and has only 2 frames more for a FAF frame on all variations of his Grab compared to Sheik (By comparison, just using Sheik as an example as she’s the best character in the roster.)
The main problem with his grab does not lie in its range, however, it’s that his dash grab has… Some hitting issues. While it will always connect at point blank range and won’t whiff in that regard, unlike a character such as Pac-Man with a rather horrible grab, it has even less range than his regular standing grab and can whiff entirely if your opponent moves forwards opposite of you. His normal grab and pivot grab are alright and can be used constantly to get opponents who love shielding out of their little bubble, but avoid dash grabbing if possible unless your opponent plays extremely defensively. Probably just me and my superstitions and not a true fact, however.
Pummel
Roy’s pummel is decently fast, not to the extent of some characters such as Lucario, but deals a sizable more percent than Lucario’s, at 2% per hit. While most characters will usually only get off one pummel before throwing, once opponents reach around 40-60% pummel them three or more times to get extra damage, as most of your throws don’t do much damage anyways and you can make up for it by pummeling them repeatedly for bonus damage. This also can help you kill with Up Throw earlier once opponents hit around 130-140% if they haven’t died by that point.
Forward Throw
Roy’s Forward Throw launches opponents forwards in front of you for follow-ups, which is extremely nice considering many of Roy’s attacks are great at reading options that opponents do. If they miss a tech at low percents, Double-Edged Dance and Dash Attack have you covered. If they tech, pivoted Forward Tilts and waiting a bit before Dash Attacking work. If they jump, any aerial covers almost all of the approaching options that opponents can do after it.
Back Throw
Back Throw is really weird; it at first glance looks extremely good, launching opponents just barely behind you and above you for a follow up in an attack such as an Up Air or Back Air. But in reality, it has too much lag after the throw to be of any use, with nearly a second of waiting before you can do anything, removing the possibility of any follow-ups. It doesn’t kill well at all, killing a level 9 King Dedede in training past 500% and has a bad angle for killing anyways, making it overall a really bad throw to use. It doesn’t even do the most damage of his throws (that title goes to Up Throw), making even THAT not a reasonable choice to use this awful garbage of a move.
Up Throw
Roy’s Up Throw is his only killing throw baring Forward Throw at obscenely high percents, launching opponents upwards and slightly behind him. It kills around 160% for a majority of the commonly-seen cast, and can reach around 180% against ultraheavyweights such as Dedede and Bowser with great DI. Combined with multiple pummels, Up Throw is a very good killing option that doesn’t require you to hit an unshielding opponent.
Down Throw

Down Throw is, by far, Roy’s best throw, being his main linker into other attacks such as Blazer as a combo at early percents, puts opponents directly in front of you for an easy follow-up, and has much more applications in Roy’s gameplay than all of his other throws (Barring the occasionally useful Up Throw as a kill move). The best thing about it is the fact that it puts opponents directly where you want them; right in the air next to Roy. This allows you to do a mindgame with your opponent; You can either Blazer for gaurenteed damage and they can possibly airdodge through it, or you can read an airdodge and charge a Forward Smash for when they land.
As a note, Down Throw into Up Air and other aerials aren't gaurenteed, but they are extremely good for catching opponents who airdodge. When doing Down Throw Blazer, you should also note that this WILL stale the move and make it weaker for damage and killing, which is probably something you won't want since you can escape from Down Throw Blazer at some percents.
The Sword of Seals- Roy Special Attacks
Roy’s Specials aren’t much to speak about; Flare Blade is pretty situational for its best use but can be useful in the neutral, Double-Edged Dance is basically Dancing Blade except more reliable and damaging, Blazer is a good kill move but a rather average to below average recovery move and Counter is… Well, a counter move. And each one has a specific purpose in his moveset - even if Roy doesn't even get a Counter skill in Binding Blade.
Neutral Special: Flare Blade
![]()
Roy’s Flare Blade more closely resembles the Neutral Special attack from Melee than Marth’s does for his Melee Neutral Special, but this time Roy’s is significantly more useful more around its new purpose: Shield Break punishes and read punishes. As an uncharged attack, it comes out very late for an attack of its power at Frame 23, and only does 6%. It is almost unpunishable, however, due to a FAF frame of 42, with enough hitstun and shieldstun on the attack to usually keep you from getting hit by an out of shield attack. At full charge, the attack will only come out at Frame 262, causes 50 damage, instant-killing almost any opponent from anywhere on Final Destination, and inflicting 10 self-damage, more akin to Ike’s Eruption. It also keeps its extremely fast FAF frame after use, being 19 frames after the last frame of the hitbox is active (Frame 265).
Flare Blade’s only true use, outside of a surprise B-Reversed attack, is for punishing a broken shield on an opponent. Due to how long the stun is from a Shield Break, using a very good shield-pressuring move such as a downwards angled Double-Edged Dance to break the shield gives you the opportunity to fully charge up the blade, which will gaurenteed earn you a stock unless opponents bounce off a roof or wall, which isn’t common as there is very few legal stages that have walls or roofs, the only one coming to my mind would be the possible Umbra Clock Tower, if that even becomes legal.
Flare Blade’s only problem is that it is very situational, as its main application of destroying shield-broken opponents only happens if opponents let their shield be broken. It also can catch players that always do, say, a roll get up or an attack get up, by surprise but otherwise is very hard to hit even a moderately charged Flare Blade with. It has similar power to a fully charged Forward Smash at about half charge, if not with more killing power, and past half charge becomes Roy’s strongest attack but is very hard to hit past about a quarter or half charge. Not the best tool but one you probably could use here and there.
Side Special: Double-Edged Dance
![]()
Roy’s Double-Edged Dance is almost identical to that of Marth’s Dancing Blade, but it is slower, has more power, and has a fiery effect to it which obviously makes it a better choice. It can be angled one of three ways after the first hit, Down, Forwards, and Up, all of which have different damage, knockback, and speed compared to the other ones. Unlike what you would expect, you can mix each strike with one another, instead of just doing up-up-up-up angled, you can do Forward-Up-Down-Forward strikes. Usually, though, this does nothing but added effect to the attack and can sometimes even prevent one of the strikes from hitting if you aren’t careful.
Forward angled is the standard version, and actually doesn’t even require a directional input in order to be done. It is, in order, a forwards slash, a downwards strike, an upwards slash, then another hit identical to the first but carrying all of the knockback and damage. This is the most commonly used one by other people, and has the most knockback and killing potential compared to the others. However, it is the second fastest, as the final hit of the Upwards version will end 5 frames sooner.
The Upwards angled version of Double-Edged Dance keeps opponents airborne during each strike, and launches upwards with the final blow. It has the second-best killing power of each of the versions, however it has some problems connecting from what I can tell at later percents. The final hit has heavily vertical knockback, meaning opponents can also DI to the sides to live much longer than they could the forwards version.
The Downwards angled version does the most damage and the final strike is multi-hit, and is a great shield pressuring tool. Each hit, if done as late as possible without getting punished, can break a shield extremely easily, which can then lead into a fully charged Flare Blade hit if you so desire to get one off. While it might be the most damaging, each strike always hits low and the final hit has the slowest FAF frame, at 76, meaning that you must make sure not to just throw it out willy-nilly in the neutral.
Double-Edged Dance, due to its slow speed but good damage, should be used mainly as a pressure tool, but use this move to however you please. I personally use this constantly in the neutral to make my opponents forced into either jumping or for them to retreat from the strikes, and I constantly use the downwards angled Dance. This is a very good and creative move, but I just wish it wasn’t basically a carbon copy of Marth’s except with a Sweetspot instead of the Tipper.
Up Special: Blazer
![]()
Roy’s Up Special is as standard as you get, and is more akin to a movable version of Mario’s Up Special than compared to Marth and Lucina’s, and now with Corrin’s release is basically a higher-damage less movement version of Draconic Ascent, for anyone familiar with that move. It is a multi-hit attack that is weaker in the air than on the ground, but both versions starting at Frame 9. Grounded version does a maximum of 20% (Initial hit does 5.5%, middle hits deal 1.1%, and final hit deals 8%. Maximum is assumed all damage gets rounded up by the RNG generator.) Airborne version deals a maximum of 14% (Initial hit does 4.5%, middle hits deal 1%, and the final hit deals 6%.)
Blazer’s best use, outside of the obvious Up Special recovery boon, is the fact it has a very good kill potential around the 120-140% range. It will launch opponents at a quite vertical angle for easily kills from the top, especially if you nail them near the blastzone with an aerial Blazer, and Blazer also combos out of Jab at kill percents if there is only moderate DI. While Roy already has a ridiculous number of killing moves, Blazer also is a great OOS move, since it comes out at Frame 9 and has enough kill power to, well, kill at 120% if an opponent isn’t careful. It also can’t be DId out of, which is pretty helpful as well.
Blazer only has two glaringly huge problems; this is in its recovery and reliability of a move. Its recovery trajectory is extremely predictable and isn’t safe like Marth/Lucina’s, despite being a better killing option, and has a problem of even connecting at all due to its rather moderate to below average speed of moving. Most opponents can simply airdodge through all of the hits if you attempt to chase them through the air with it, as well as Jab-Blazer against good DI being almost impossible to connect, and Blazer doesn’t have a Sweetspot (Although that’s more of a good thing than a bad thing, honestly). Although it could use a few (massive) improvements, Blazer is a good move for what it has to be, and could be a LOT worse.
Down Special: Counter
![]()
Counters are definitely moves you have come across, even if you are barely a competitive player; a ton of characters have it as their Down Special, to name a few, Greninja, almost all of the Fire Emblem representatives barring Robin, Mii Swordfighter, and Little Mac. Roy’s is one of the more average ones out there, having less active Counter frames, and having its first active frame start later than most other counters, but having the most power of any (Corrin’s has less power but launches at a much better angle, and thus it will kill usually earlier.) It has a minimum base damage of 9% and is able to be acted out of after 60 frames, or 1 full second.
It’s only and obvious use is for punishing mistakes and for getting out of sticky situations that you don’t want to be in. If you see an opponent charging a strong attack, prepare to counter. If you know a specific opponent loves to edgeguard you with Forward Airs, counter. If it is a Little Mac, counter like there is no tomorrow and it’s practically the only move you know. Actually, don’t do that, but prepare to counter A LOT.
Its obvious downside is that, after the counter window ends, the attack is basically just a ‘HIT ME’ sign plastered directly onto your forehead while you are a giant massive wall preparing to have its rear end kicked. Spamming this move in the neutral WILL get you punished, and you cannot counter Grabs. Avoid using this move unless it is necessary or you are going for a surprise hit.

Roy’s Flare Blade more closely resembles the Neutral Special attack from Melee than Marth’s does for his Melee Neutral Special, but this time Roy’s is significantly more useful more around its new purpose: Shield Break punishes and read punishes. As an uncharged attack, it comes out very late for an attack of its power at Frame 23, and only does 6%. It is almost unpunishable, however, due to a FAF frame of 42, with enough hitstun and shieldstun on the attack to usually keep you from getting hit by an out of shield attack. At full charge, the attack will only come out at Frame 262, causes 50 damage, instant-killing almost any opponent from anywhere on Final Destination, and inflicting 10 self-damage, more akin to Ike’s Eruption. It also keeps its extremely fast FAF frame after use, being 19 frames after the last frame of the hitbox is active (Frame 265).
Flare Blade’s only true use, outside of a surprise B-Reversed attack, is for punishing a broken shield on an opponent. Due to how long the stun is from a Shield Break, using a very good shield-pressuring move such as a downwards angled Double-Edged Dance to break the shield gives you the opportunity to fully charge up the blade, which will gaurenteed earn you a stock unless opponents bounce off a roof or wall, which isn’t common as there is very few legal stages that have walls or roofs, the only one coming to my mind would be the possible Umbra Clock Tower, if that even becomes legal.
Flare Blade’s only problem is that it is very situational, as its main application of destroying shield-broken opponents only happens if opponents let their shield be broken. It also can catch players that always do, say, a roll get up or an attack get up, by surprise but otherwise is very hard to hit even a moderately charged Flare Blade with. It has similar power to a fully charged Forward Smash at about half charge, if not with more killing power, and past half charge becomes Roy’s strongest attack but is very hard to hit past about a quarter or half charge. Not the best tool but one you probably could use here and there.
Side Special: Double-Edged Dance

Roy’s Double-Edged Dance is almost identical to that of Marth’s Dancing Blade, but it is slower, has more power, and has a fiery effect to it which obviously makes it a better choice. It can be angled one of three ways after the first hit, Down, Forwards, and Up, all of which have different damage, knockback, and speed compared to the other ones. Unlike what you would expect, you can mix each strike with one another, instead of just doing up-up-up-up angled, you can do Forward-Up-Down-Forward strikes. Usually, though, this does nothing but added effect to the attack and can sometimes even prevent one of the strikes from hitting if you aren’t careful.
Forward angled is the standard version, and actually doesn’t even require a directional input in order to be done. It is, in order, a forwards slash, a downwards strike, an upwards slash, then another hit identical to the first but carrying all of the knockback and damage. This is the most commonly used one by other people, and has the most knockback and killing potential compared to the others. However, it is the second fastest, as the final hit of the Upwards version will end 5 frames sooner.
The Upwards angled version of Double-Edged Dance keeps opponents airborne during each strike, and launches upwards with the final blow. It has the second-best killing power of each of the versions, however it has some problems connecting from what I can tell at later percents. The final hit has heavily vertical knockback, meaning opponents can also DI to the sides to live much longer than they could the forwards version.
The Downwards angled version does the most damage and the final strike is multi-hit, and is a great shield pressuring tool. Each hit, if done as late as possible without getting punished, can break a shield extremely easily, which can then lead into a fully charged Flare Blade hit if you so desire to get one off. While it might be the most damaging, each strike always hits low and the final hit has the slowest FAF frame, at 76, meaning that you must make sure not to just throw it out willy-nilly in the neutral.
Double-Edged Dance, due to its slow speed but good damage, should be used mainly as a pressure tool, but use this move to however you please. I personally use this constantly in the neutral to make my opponents forced into either jumping or for them to retreat from the strikes, and I constantly use the downwards angled Dance. This is a very good and creative move, but I just wish it wasn’t basically a carbon copy of Marth’s except with a Sweetspot instead of the Tipper.
Up Special: Blazer

Roy’s Up Special is as standard as you get, and is more akin to a movable version of Mario’s Up Special than compared to Marth and Lucina’s, and now with Corrin’s release is basically a higher-damage less movement version of Draconic Ascent, for anyone familiar with that move. It is a multi-hit attack that is weaker in the air than on the ground, but both versions starting at Frame 9. Grounded version does a maximum of 20% (Initial hit does 5.5%, middle hits deal 1.1%, and final hit deals 8%. Maximum is assumed all damage gets rounded up by the RNG generator.) Airborne version deals a maximum of 14% (Initial hit does 4.5%, middle hits deal 1%, and the final hit deals 6%.)
Blazer’s best use, outside of the obvious Up Special recovery boon, is the fact it has a very good kill potential around the 120-140% range. It will launch opponents at a quite vertical angle for easily kills from the top, especially if you nail them near the blastzone with an aerial Blazer, and Blazer also combos out of Jab at kill percents if there is only moderate DI. While Roy already has a ridiculous number of killing moves, Blazer also is a great OOS move, since it comes out at Frame 9 and has enough kill power to, well, kill at 120% if an opponent isn’t careful. It also can’t be DId out of, which is pretty helpful as well.
Blazer only has two glaringly huge problems; this is in its recovery and reliability of a move. Its recovery trajectory is extremely predictable and isn’t safe like Marth/Lucina’s, despite being a better killing option, and has a problem of even connecting at all due to its rather moderate to below average speed of moving. Most opponents can simply airdodge through all of the hits if you attempt to chase them through the air with it, as well as Jab-Blazer against good DI being almost impossible to connect, and Blazer doesn’t have a Sweetspot (Although that’s more of a good thing than a bad thing, honestly). Although it could use a few (massive) improvements, Blazer is a good move for what it has to be, and could be a LOT worse.
Down Special: Counter

Counters are definitely moves you have come across, even if you are barely a competitive player; a ton of characters have it as their Down Special, to name a few, Greninja, almost all of the Fire Emblem representatives barring Robin, Mii Swordfighter, and Little Mac. Roy’s is one of the more average ones out there, having less active Counter frames, and having its first active frame start later than most other counters, but having the most power of any (Corrin’s has less power but launches at a much better angle, and thus it will kill usually earlier.) It has a minimum base damage of 9% and is able to be acted out of after 60 frames, or 1 full second.
It’s only and obvious use is for punishing mistakes and for getting out of sticky situations that you don’t want to be in. If you see an opponent charging a strong attack, prepare to counter. If you know a specific opponent loves to edgeguard you with Forward Airs, counter. If it is a Little Mac, counter like there is no tomorrow and it’s practically the only move you know. Actually, don’t do that, but prepare to counter A LOT.
Its obvious downside is that, after the counter window ends, the attack is basically just a ‘HIT ME’ sign plastered directly onto your forehead while you are a giant massive wall preparing to have its rear end kicked. Spamming this move in the neutral WILL get you punished, and you cannot counter Grabs. Avoid using this move unless it is necessary or you are going for a surprise hit.
Critical Astra: Roy Combos and Strings
Roy doesn’t have many true combos that last more than two attacks, but he has a few strings and one or two combos thrown in there that work at rather low percents or are killing ones. Many of them can also be escaped by inputting with good Smash DI and good DI overall, so be wary about the percentages listed on those that are.
If variables are listed, they are based around Level 9 CPUs DIing in Training mode. So, they might work earlier or later depending on human AI.
Jab>Grab (Then whatever you want afterwards)
This might seem pretty basic, but it’s a really good bread n’ butter follow up after a Jab hits, especially if an opponent hits your shield. It can lead into Blazer as a follow up for Down Throw, a Forward Smash airdodge read on the exact same throw, and can start tech chases at slightly later percents with Forward Throw into a Dash Attack or Forward Air. It also can get opponents in really bad situations if they aren’t careful and get back throwed or don’t know how to escape grabs and get pummeled 5 or more times. It’s the main thing that sets up some of the later strings, which will be showcased right after this bit.
Jab>Down Throw>Jab>Forward Throw>Dash Attack/Forward Air
One of the many miscellaneous strings that Roy has, this one isn’t all that common that I can land it but maybe you will have more of an opportunity than I ever will. Jab-Grab-Down Throw-Jab will connect, and if opponents don’t have a reaction or DI badly you can get another grab and Forward Throw and prepare to read opponents and their reactions. However, it is a string that will work most of the time against unaware players, so use it sparingly if you feel like you have a good chance to get it off.
Jab>Down Throw>Jab>Down Throw>Up Air/Up Tilt
Another string that Roy has, but doesn’t work nearly as often. It is rather similar to the previous string but can put opponents into the air for more… Aerial-based follow-ups. Works best on Fast Fallers and heavyweights due to the Jab-Down Throw combos, but it still works only at very low percents.
Forward Throw>Double-Edged Dance (Around 30-50% where opponents are forced into teching unless upwards DI)
Roy’s Forward Throw often forces situations where opponents have to tech or jump due to its low, very horizontal knockback, and at early percents can lead into a Dancing Blade if they choose to tech in place or miss a tech. Opponents who jump out of this get caught by an Up Air if you can read them jumping out of it, and tech back and forward rolls can be Dash Attack or grab punished, especially pivot or dash grabs.
Ledge Trump>Back Air (Kills around 100% or less)
Ledge trumping, for those unfamiliar with the word, is when you grab a ledge after an opponent and they are forced off it, and into the air behind you. This allows you to get a free follow-up and can catch people offguard if you dash offstage and grab onto the ledge during their recovery. Back Air, being one of Roy’s strongest aerials, fits into this perfectly, killing from the blastzone at 100% or lower against the entire cast (Maybe not Bowser/Dedede, testing is difficult). It also isn’t that hard to land, but smart players will use Up Bs and ignore the ledge to catch you waiting, so mix up how you plan on stopping their edgeguard to throw them off.
Jab>Blazer
A small tip was given to me from a friend that this worked on Fox and Falco, and I became interested and started testing. And from what I can figure out, around the 95-140% range, based on character weight and DI, every single character in the game can die to this. For example, Fox dies around 100 to 130% due to his fast faller nature making him even more susceptible as well as Rosalina dying around 90% instead. It won’t work around the 100% if your opponent has away DI,
SHFF Up Air>Up Tilt
A short bread and butter, which will become very familiar to you if you begin to start using it. Short hopping with an Up Air around the end of the hop for just enough length of its hitbox to come out all the way gives you a very heavy amount of follow-ups, and Up Tilt is one of the better ones early on. It leads into reads as opponents will be put into the air directly in front of you, letting you read airdodges with Smashes or just jumping and following up with aerials or another Up Tilt. Works up to around 70% or so, but I can’t really confirm that well.
SHFF Up Air>Jab
Up Air into Jab works only at very low percents due to its limited range, but it gives follow-ups in terms of everything that the normal Jab can do, except some won’t work due to them either requiring a late percentage or the knockback of Up Air forcing you to hit only the Sourspot of the Jab. I find myself doing this very rarely, as I never get off a SHFF Up Air at a low enough percent. Works from about 0 to 40% depending on Weight and DI.
SHFF Up Air>Weak Hit of Forward Tilt
A much more useless version of this string of 2 attacks compared to any other variant. Avoid at all costs if possible, but if you seriously need to Forward Tilt can connect, usually with the Sourspot due to Jab’s angle and base knockback. It has no uses outside of spacing opponents away from you (which is what you probably don’t want as a Roy player), so focus on using other versions of this combo. It works only at a very low percentage.
SHFF Up Air>SHFF Up Air
Another string that connects significantly later than what you’d expect, as the attack can link into itself. While not as useful as, say, SHFF Up Air into Jab or SHFF Up Air into Back Air, this allows you to keep opponents in the air above you instead of forcing them away, putting you in an advantageous situation. It works from about 30% to 80%, depending on opponent weight and gravity.
SHFF Up Air>Blazer
Yet another random chain that you now know about. Once again, another less useful combo, but it does some damage and works to a certain percent of which I have not determined as of so far. All of the other versions of this chain barring the weak hit of Forward Tilt have significantly more use, so avoid this unless you think it will connect for extra damage.
SHFF Up Air (Landing On Opponent)>Back Air or Forward Air
Basically the same as many of the rest of the Up Air combos, except it utilizes Forward/Back Air for a bit more damage but almost only works when opponents DI towards Roy. Back Air does 1% more than the Forward Air punish, but otherwise is pretty much the same. Back Air also comes out faster, but that doesn’t exactly mean much since you should be inputting fast enough for opponents to not be able to act out of it. Works around 40 to 90% or something.
First hit of Neutral Air>Jab, Up Tilt, Grab, Forward Tilt, Blazer
Neutral Air has very similar qualities to Roy’s Up Air in terms of combo potential, but due to having less hitstun on hit and opponents being able to act out of it faster slow moves will not be able to connect after it or any other aerials. As such, Roy is a bit more limited than with Up Air, but the first hit of Neutral Air DOES combo into his grab significantly past Up Throw’s kill range, which is good for a confirm into a gaurenteed kill if your opponent is at a high enough percent or they get pummeled into that percent. For example, Fox still gets caught by Grab at 225% despite dying to Up Throw back at the 160s, as well as to Up Tilt and Forward Tilt. Which can get insane once an opponent misses one punish then you land the first hit of the Neutral Air. Of course, this isn’t always going to occur, but it’s another combo to take note of considering Neutral Air is one of your best tools all around.
At later percents is where this begins to shine, as Neutral Air’s first hit sweetspotted has low knockback, decent hitstun, and now becomes able to combo into his Up Tilt, Forward Tilt, and Blazer for a kill. At earlier percents you can just do Neutral Air into a Jab>Grab or just straight up into a Grab, but at this percent these become impossible or very hard to do. However, just begin using those moves once opponents reach around 120-130% and kill them easier than you could with a Forward Smash read.
Taking Advantage of the Forests: Playing Roy Tips and Tricks
After viewing the most popular Palutena guide out there, I have decided that a section covering one of the most important things about Roy, which is actually PLAYING as Roy and not just how to implement Roy’s moves into your gameplay. Having knowledge of your moves is great and all, but you will get nowhere unless you know your fundamentals. And that’s where this portion shall come in handy, which covers how to play with Roy during an actual match and not during training.
Approaching, Neutral, and Retreating: Grounded
Roy has an above-average collection of approaching tools on the ground, and can retreat slightly worse but not extremely badly only due to his sweetspot mechanic. For approaching, grabs, pivot Grabs, pivot Forward Tilts, Pivot Jab and pivot Down Tilts all work excellently to catch opponents off guard and can deal with next to any situation that occurs, and the first two and the second-to-last options all have follow-ups which you can take advantage of.
Grabs, obviously, are the best thing that Roy can get off due to his awful shield options excluding his grab, and are a pivotal part (Heh, perfect pivotal…) in his gameplay. You won’t be just willy-nilly- running around and using grabs just because you can, but you will be using it for Down Throw follow-ups and the pummeling attribute that can rack up damage absurdly quickly. Pivot Grab works the same way but covers a bit of distance. Forward Tilt gives you a bit of breathing room and can kill at later percents, and cause tech chases at early ones and can net you a quick Double-Edged Dance if they roll in, tech in place, tech towards you, attack getup, or getup normally. Rolls away are difficult to deal with, but just get used to letting them do that then reading their reaction.
The Neutral for Roy is, well, basically just his Approaching tactics – constantly being aggressive and forcing mistakes and an advantageous state for yourself. If you have platforms, make the best use of them possible by sharking platform hoggers or Up Airing them, and do the same but expect opponents to force you off and hold down your shield.
When retreating you have significantly less ‘good’ options than in the Air, but all of the same moves apply. Grabs, especially Pivot Grabs, are very good for getting yourself back into an aggressive state and Jab/Down Tilt are still extremely useful. Forward Tilt also gives you space and covers a very useful arc, and provides yet another tech chase opportunity against opponents.
Up Tilt can be used in the neutral, but it’s rather slow and on whiff or block it’s extremely bad, so it is better saved for punishes and killing at later percents. The same goes for all of his smashes; they can be used, but are insanely unsafe and are best for reads at kill percents. Flare Blade is too weak at low charge to be useful and takes too long to charge to be good either, and is best saved for shield breaks. Double-Edged Dance is pretty punishable but is very useful on hit, especially the downwards angled strikes which do impressive shield damage and standard percent damage, but due to them being grabbable in-between each hit without perfect timing means that you should restrict yourself and not get too predictable.
Approaching, Neutral, and Retreating: Aerial
Roy’s got a much easier time approaching and retreating in the air due to him not being as easily caught off guard, his very wide variety of good aerials at his disposal, little landing lag that is even better than just using a tilt on the ground most of the time, and a very good short hop. I’d almost say approaching through the air would be 100% better than grounded, but unfortunately this is not Persona 4 Arena Ultimax or any other fighting game people play and you can’t just grab opponents out of the air and slam them into the ground.
Thatd be cool tho
Roy’s Neutral Game consists mostly of approaching opponents with Neutral Airs, Forward Airs, and SHFF Up Airs to initiate the strings mentioned back in the combos section. You can also do Tomahawks into grabs or grounded Jab/Up Tilt to start something. Neutral Air works especially well, as opponents who whiff an attack against the approaching Roy will proceeding eat a face-full of steel blade. Forward Air can’t AC unless you do it frame perfectly and jump on one of the final frames of the initial jump, in which case you will do another jump and have an extra action. SHFF Up Air is basically the standard high-overhead coverage move that works well and combos into a wide variety of moves, as you can tell from back in the combos section. If you didn’t just glance over that.
And when retreating, you have basically the exact same options, but then you also have Back Air. Retreating with a Back Air puts out a stronger hitbox behind you at the cost of landing lag, making whiffing a REALLY bad idea as well as why it isn’t in the approaching portion: It ain’t safe. You also can do Retreating/Approaching Air Flare Blade and Double-Edged Dance, but those usually either won’t connect or you will hit with one or two a match and not much more.
Out of Shield Game
Out of Shield, or OOS, is a popular term for how you can react from getting hit by, say, Mario’s third hit of his Jab and react to it or a Marth Forward Smash and punish their lag in the process. Many of Roy’s moves are either a bit too slow or are too weak at the tip to do this well, but he does have a few options at his disposal for royally screwing over people who think that Rest is a safe move with Jigglypuff.
Blazer is a very common option, covering a heavy amount of distance, Jumps if the opponent can react fast enough out of their own move, and does good damage. It also kills at later percents, another awesome trait of it. Jab, Forward Tilt, and Down Tilt obviously work, but they might not connect if you get pushed back too far. Grab is the basic end-all-be-all OOS option that is very good in any situation, and follows into a Pummel and Down Throw. Double-Edged Dance also works, but not as well.
Going Deeper into Bern: Roy Advanced Techniques
Roy is a character that on paper looks basic and almost one directional, with a basic approach consisting of Neutral Airs, Forward Airs, and Dash Attacks if you wish to play risky. And some players do play like that, doing only the same strategies over and over, expecting it to work. However, in the competitive scene, knowing only your fundamentals will only get you so far against opponents willing to use every technique to their advantage. And as such, knowing each of these, how to counter them, and when to use them in your gameplay will help you succeed as a Roy player.
And still, don't worry about not learning these right off the bat and immediately once ou start playing him. I can barely do any of these right now myself despite knowing about them, and even I'm still learning.
Dash Dancing
Dash Dancing is a very old strategy that was often used, and much more useful, back in Smash Bros Melee, where all you had to do was flick the directional stick back and forth, causing characters to start dashing back and forth, throwing off opponents. This was heavily nerfed in Super Smash Bros. Brawl by the introduction of Tripping, but now that random tripping is removed players are able to still do Dash Dancing, although now it is much more tight of a window for flicking back and forth (Almost to the point that it is nearly a sixth of a second window or shorter.) However, most of its applications still apply today.
It’s main application is to promote a massive mindgame with an opponent. If they see you initiate a Dash Dance (And you get good enough and have enough stamina to actually maintain it past the first ten dashes like I can’t), they have one of four options, with the fourth being a variable one: They can retreat anticipating that you are going to try to grab or input an attack making them lose momentum, they can dash towards you or initiate their own Dash Dance, which can be advantageous for you if you expect them to be aggressive, they can attempt to punish you and throw out an attack, while you can cancel a Dash Dance with a Shield or a Roll and can punish them afterwards, or they can go and projectile camp. In all situations outside of the last one, you have a pretty good chance of coming out on top, while in the last one you basically just told the opponent ‘Here, I’ll make myself look cool while you prepare to win over there. ‘Kay?’
Extended Fox-Trotting
Extended Fox-trotting is similar to Dash Dancing in function and inputs. It involves users dashing in one direction, inputting another dash in the same direction you are travelling after a short amount of distance crossed, then IMMEDIATELY inputting a dash in the opposite direction to cause the character, in this case Roy, to dash backwards. You can then repeat this process to cover more space than Dash Dancing, although its timing is almost as thin and might be harder for some players to grasp fully. Its main application is to cover large distances after a Dash Dance and for the mindgame it sports. While I’d make another section on THAT again, I don’t feel I need to mention that and I’ll just say that you should also read the Dash Dance section for information on that.
Pivots and Perfect Pivots
Pivots are very simple to do: Dash in one direction, and turn around. You can then input Forward Smashes and Forward Tilts out of a dash behind you. This can catch rolls. However, Perfect Pivots are done by flicking forwards then, in about a two frame window, flick behind you. This will cause the initial dash distance of your, well, dash, come out but you be turned around in a standing position. This allows you to do anything out of a movemental dash, similar to a wavedash, and with any tools listed before this or after this able to come out after a Perfect Pivot. Pivots and Perfect Pivots are the absolute most important tool for you to learn outside of your fundamentals, as they increase the space that you can cover when doing one move.
Reverse Specials, B-Reversing and Wavebouncing Specials
Reverse Specials are done by a very basic command. Before inputting a Neutral Special, hit the direction you are not facing, release, then hitting the special button. This will cause your character to turn around in mid-air, retaining all momentum, but charging a Flare Blade in this case behind them. Mixing up approaching with Forward Airs and Neutral Airs and reversed Flare Blades can catch players who like rolling in, making it a technique you may wish to invest time into.
B-Reversing is a very useful technique done by, when in the middle of an aerial jump, hitting the Special button and then flicking in the opposite direction you are facing almost immediately afterwards (Not DURING the special button, otherwise you will input a side special instead of what you wished for), causing all momentum to switch around. You can also do dashing B-Reverses on the ground or just walking B-Reverses, but they only turn characters around, but is faster than turning around and then hitting Neutral Special. Roy’s aerial movement is pretty good, and when doing a wavebounce he moves a slight distance backwards while charging a reversed Flare Blade.
Wavebounces combine these two techniques together. Before inputting the Special button, flick the directional stick backwards, then hit Special. Then, a few frames after inputting Special flick the direction you WERE travelling. If successful, your character will be charging a Flare Blade forwards while making a short hop backwards. This is by far the most useful technique out of the three, despite being harder to do, as not only can you still catch back rolls, but you can also catch dashes in and still keep pressure up instead of having a Flare Blade being charged behind you.
While these three techniques may seem complex and by far out of your league (And don’t worry – Even I myself can barely do Wavebounces, but that might be in part of the fact I main Little Mac), and hell, you might be right, they are vital towards getting better mindgames onto your opponents and at least knowing about these may give you an edge against players that can use these techniques, as you will now know how to beat these out.
SHFF & SHFF’ed Attacks
SHFF, or Short Hop Fast Fall, is an extremely easy concept to grasp: You input a short hop by tapping the jump button, whatever it is you have it set to (For myself X and LB, although I never touch that bumper, are my jumps, Y is grab, RB is Shield, and the rest is standard. I use a 3DS as it is my only system outside of occasionally going to a friends’s house for a Wii U), and then tapping down at the apex of your jump. This in itself is a very good strategy for approaching with characters with good aerial games, as you can input aerial attacks very quickly as well as aerial specials by doing this and land as fast as possible. Empty jumps also bait out reactions and you can do any immediate action about 4-6 frames after landing (slightly variable with characters, Roy’s is 5 Frames.)
Tactician Studying The Terrain: Roy’s Matchups and Best/Worst Stages
"Why am I here? Whatever, Let's just stretch!" -Male Wii Fit Trainer, 2016
Roy loves having situations good in his favor, being one of the lesser characters in Smash 4. However, there are specific situations in which he shines best; and many of these are due to the matchups that Roy can excel in. He doesn’t have many of these, but when those occur he can wreak havoc on an opposing player, mentally and physically. And this does NOT mean you get to shine on the 'physical' aspect, Wii Fit Dummy >.>
Things below will only cover good, neutral, and bad matchups, and knowledge I have gotten from others and my very bare knowledge of Smash 4 legal stages.
Good Matchups
Roy, despite being a low tier albeit at the top of his ‘low’ tier below Robin and Bowser, who are the bottom of middle tier, Roy excels at beating specific character archetypes. He is significantly more useful in those matchups rather than against other ones, of which are much more plentiful.
Roy does very well against characters who have problems dealing with rushdown, in particular Robin who, despite being a very good zoner, has problems getting out his projectiles whenever he wants due to the startup on them being just enough to dash in and Neutral Air or enough time to jump over and read their reaction. Wii Fit Trainer is lightweight enough to die at early percents and loves having space to get up Headers, Sun Salutation… heat balls, and Deep Breathing, all of which can be interrupted barring Header, which simply requires a basic shield to deal with. Pac-Man also fits under here, although he has a few ways of dealing with Roy through his myriad fruits and that goddamn fire hydrant.
Roy also does well against some of the lighter characters in the cast due to him having very early killing options, in specific Jigglypuff, Mewtwo, and Game and Watch. Jigglypuff overall is very bad in Smash 4, possibly taking the spot for worst character out there, but she can use Back Air to very quickly net a gimp or stage spike you if you try to recover low, but dies at like 20% if she takes 1 wrong step. Mewtwo has several dangerous moves and can space (sort of) with Shadow Ball, but likes having a bit of breathing room for some cooldown time to get back a Shadow Ball. Brainlessly approaching will only get you grabbed and Forward Air’d, but careful play can easily net you an easy kill. Game and Watch has a mostly linear high-level playstyle, but if you can figure out what an opponent goes for most of the time when approaching or retreating, reacting to this WILL net you early kills. It doesn’t help his shield is weak and he guaranteed dies to Flare Blade, as well as Mewtwo. Jigglypuff just straight-up dies to a shield break due to a rather funny mechanic (Trust me and test it yourself, non-believers in the Gods of Sakurai.)
Lastly, Roy also does well against heavyweights and can do slightly better than you’d expect against fastfallers due to his combos lasting for a while against him, especially the SHFF Up Air links, Jab-Blazer, and Down Throw-Blazer. King Dedede, Donkey Kong, Fox, and Greninja have problems in this regard, although the fastfallers go much more neutral than a good matchup but still get comboed to hell and back, if not even worse than the heavyweights due to dying earlier to the combos. And he isn’t really limited to them, either – other Fastfallers also do pretty average against him for the reason of them being, well, fastfallers, although usually they have other attributes which makes them better against Roy than Greninja and Fox.
Neutral Matchups
Most of the things not mentioned in the good or bad matchups are Roy’s neutral matchups, but a few notes I’d like to make here: Bowser, despite being listed as a heavyweight in the Good Matchups section, also has a pretty good grab combo game which can be pretty aggravating to deal with, especially if people are able to grab you and successfully combo you. Donkey Kong also counters towards this regard. Game and Watch, as well as Kirby, can combo you to death due to your average to below-average combo ability, especially Kirby, who can just Up Tilt you into death and Forward Throw follow-ups are difficult. Other than that, most of the characters not explicitly mentioned otherwise most likely have a neutral matchup. Some others might fit into roles that you wouldn’t expect to put into a basic list such as this one,
Bad Matchups
Roy begins to suffer once he fails to be able to approach opponent successfully due to a variety of reasons. Many of these are merely due to the type of character that he is; a disjointed character that relies on offensive pressure and a constant aggression gameplan in order to be successful. It also can be attributed to his fast falling speed and merely mediocre weight, when combined together give him less survivability than you would expect out of an armored swordfighter. And remember, like the others, these all just depend on how the person you are playing against plays specific characters.
Characters with projectiles can easily stuff out Roy, since few attacks are blockable by just using Neutral Air/Jab and even then clashing with projectiles is a bad idea, specifically characters such as Cloud, Villager, and Sheik (obviously) are among the better ones at keeping him out.
Others with fantastic defensive games, such as Villager and Duck Hunt, are able to constantly keep Roy approaching towards their swarm of projectiles, which can end in an easy grab for them. Robin also fits into this, although he has massive problems if Roy manages to get in and hit a Neutral Air or a SHFF Up Air.
Offensively-oriented characters with disjoints that generally can preform better or have more range such as Marth/Lucina, Cloud, and Meta Knight succeed in playing aggressive better against Roy due to having either a niche in certain attacks or just being overall better at the aggressive role that Roy usually takes into, and reversing the situation from how it should be.
Combo-based characters are also absurdly insane against Roy due to his moderately low weight and fastfaller nature, especially Mario, Sheik, Luigi, and other characters with great combos. Bowser also can perform moderately well in this regard, despite usually being an average matchup by terms of what I consider, due to the Up Throw-Up Air and Neutral Air follow-up being pretty good.
According to tips given to by fellow Roy players, Certain matchups may be considered more difficult by some people. Tahu Mata said that he wins against almost all of the characters below him and loses to those above him, but that most are not unwinnable. BeetleJojo, from Pokemon Showdown, said that Zoners heavily rip Roy a new bum. (Not his actual words but still). And I personally find that characters with great projectiles, as listed above, are really good against him and probably require a secondary to deal with.
For the next portions, I’m not knowledgable on most of the Smash 4 stages since I play almost explicitly on 3DS. So, forgive me.
Good Stages
Roy loves most of the stages with platforms, as they allow you to continue your combos a little bit later than you normally could. Battlefield and Dreamland in particular are very good for Roy, as SHFF Up Air combos can be extended by landing on the platform after using a second Up Air to link together ANOTHER Up Air or an Up Tilt, depending on opponents percent. Lylat Cruise also helps in this regard, and the tilting stage can assist in your recovery as much as it can screw yours over. Town and City as well as Smashville also have abusable platforms, although to less of an extent of Battlefield and Dreamland’s.
Bad Stages
The only one I can list off the top of my head would be any Omega stage and Final Destination, as flat stages are capable of possibly being helpful in the fact other people can’t extend combos utilizing platforms such as Mario and Sheik, to be specific, but also letting there be no place to extend combos, no areas to be safe from projectile-based characters and giving no breathing room in any matchup. Especially Sheik, who can just outcamp you by using Needles and force approaches, which are extremely difficult to deal with, and Villager, who just holds onto the ledge and uses his Slingshot. Be cautious about opposing characters and what stages they enjoy, and attempt to ban those if at all possible.
Thank you for, if you have managed to read through all of this and NOT passed out or taken more than fifteen days! This has taken me a LOT of my free time to test things out, ask around, get access to a friend's Wii U for a short time to do extra testing on, several 3DS hours into Training, with Friends, and on For Glory just seeing if what I had listed could be put into an actual match. And this also couldn't have been possible without my two absolute best friends IRL, Benny and Robert, for 1. Giving me the idea to make this guide by sucking at Roy, 2. Being there to give me basically target practice when I was testing stuff as Roy, and 3. Being good friends overall. Thanks, all of ya.
AkameZora, out.
...And a few minutes later I'll be told I screwed something up, knowing my luck.........

This guide is actually pretty old and misses out on tons of things that Roy can do - Down Throw into virtually every aerial follow-up, Forward Throw into Dash Attack, Regrab on a tech chase, or Double-Edged Dance, Up Air combos into everything, Jab>Fair kills at ledge, et cetera. However, its basically my beginner's guide for Roy. There are much better guides out there likely; you should find one of those.
Or access the Roy discord via Smashcord.com; do that and you'll find me alongside a bunch of the Roy mains that have more information this poor guide could ever give XD